Caulk Texture Painting Tutorial: How Jay the Painter Builds 3D Art
A real caulk texture painting tutorial from Jay the Painter — the Akron Ohio artist who has made this technique his signature. Learn the tools, the process, the layering method, and why patience is the most important skill.
Caulk Texture Painting Tutorial: How Jay the Painter Builds 3D Art
People ask Jay the Painter the same question constantly: How do you make your paintings look like that?
The answer is caulk. Flexible caulk, applied in layers to a canvas before any paint is added, building up real three-dimensional structure that the paint then reveals.
This is not a technique you will find in most art schools. It is not covered in most painting books. Jay developed and refined it over years of experimentation, and it has become the defining characteristic of his work.
Here is how it works.
What You Are Actually Looking At
Before getting into the tutorial, it helps to understand what a caulk texture painting actually is.
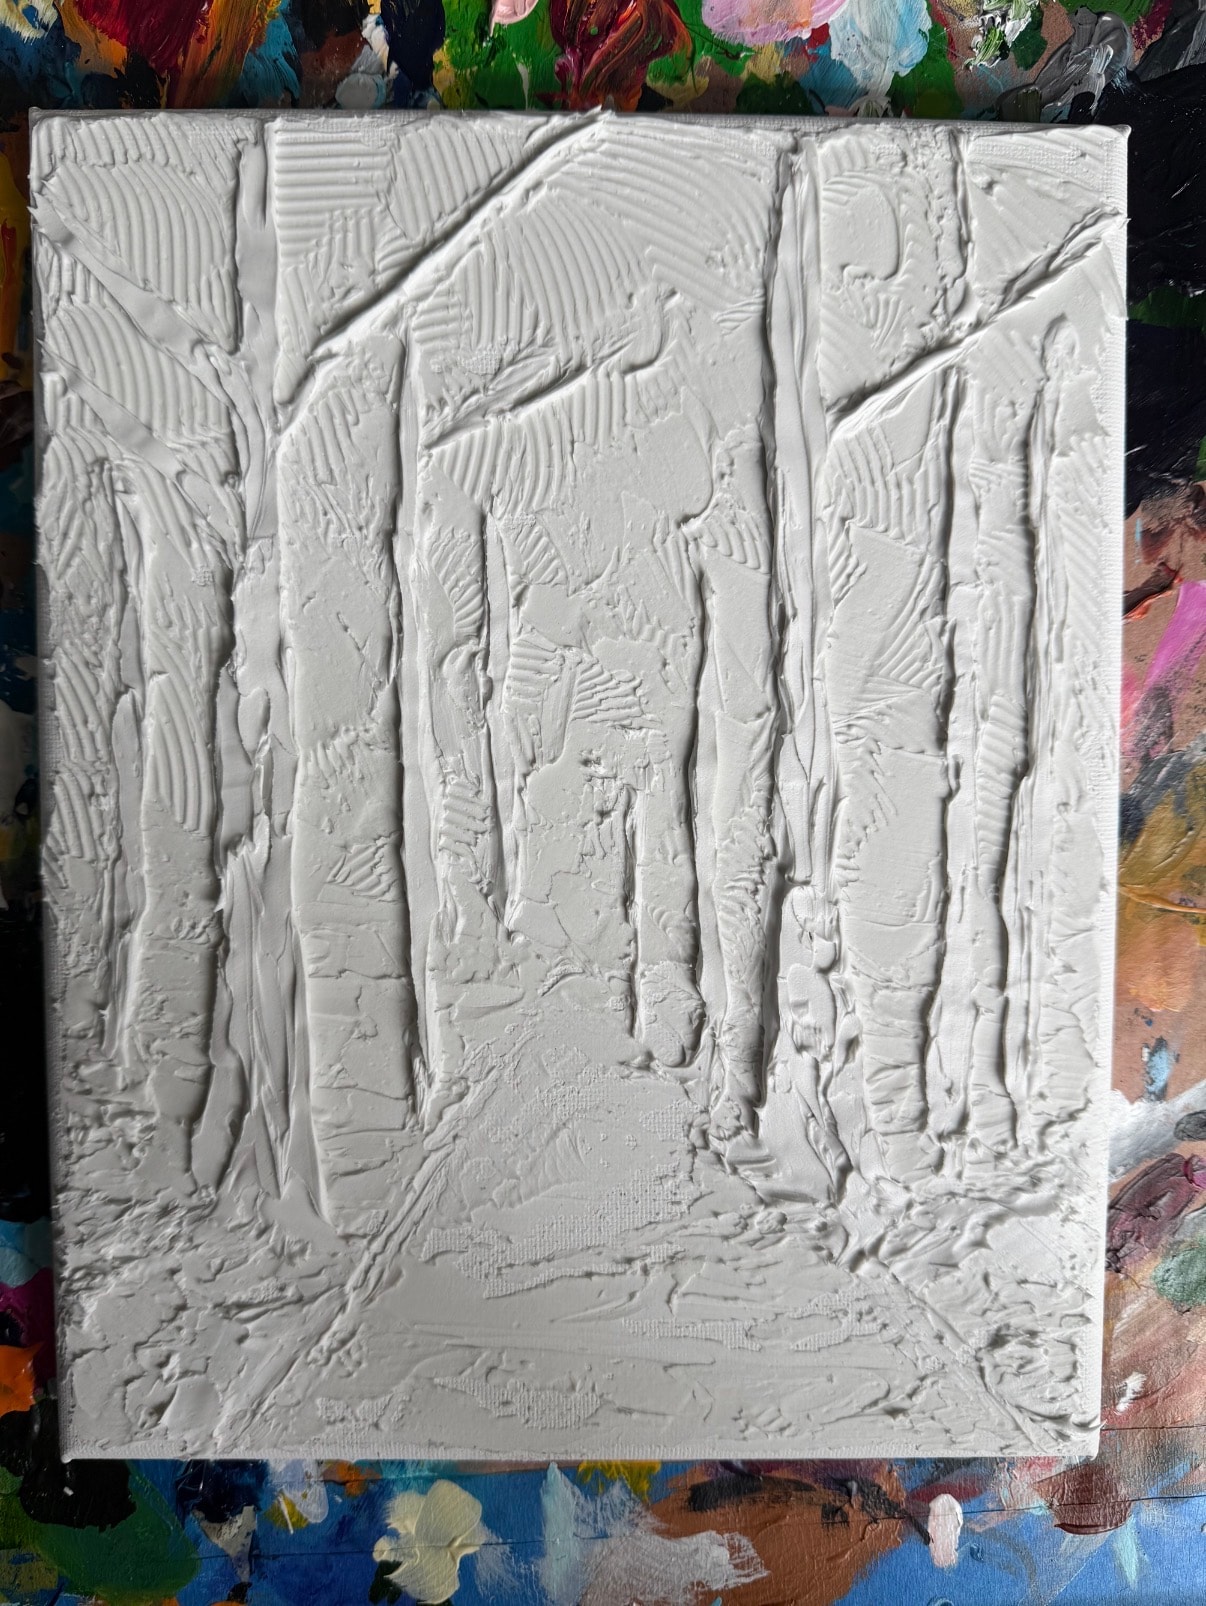
This is Blue Forest Path at Stage 2 — the forest composition is fully sculpted in white caulk, before any paint has been applied. The trees, path, and canopy are all built up in raised caulk relief.
What you are looking at in this photo is not a painting. It is a sculpture. A three-dimensional relief built entirely from caulk on a canvas surface.
The painting comes later. First, the sculpture has to be complete.
The Tools
Jay's caulk texture technique requires a specific set of tools:
Caulk gun and caulk tubes — The primary tool. Jay uses flexible acrylic caulk, which remains pliable after curing and moves with the canvas. The caulk gun allows controlled application of the caulk in lines, dots, and shapes.
Palette knives — Used to spread, shape, and texture the caulk after it is applied. Different knife shapes create different textures — a flat knife creates smooth surfaces, a pointed knife creates fine lines, a serrated knife creates rough texture.
Brushes — Used to smooth caulk into fine details and to apply paint in the final stage.
Canvas — A standard stretched canvas. The caulk adheres well to canvas and the flexibility of the canvas works with the flexibility of the caulk.
Acrylic paint — Applied in the final stage, after all caulk layers are fully cured.
Stage 1: Planning the Composition
Before any caulk is applied, Jay plans the composition carefully.
This is more important in caulk texture painting than in most other techniques, because the texture is built before the color is added. You need to know where every element will go — which areas will be raised, which will be recessed, how the light will fall across the finished surface.
Jay often sketches the composition lightly on the canvas before beginning. The sketch is a guide, not a constraint — the caulk application will develop its own character as it goes — but having a clear plan prevents major structural mistakes.
Stage 2: The First Caulk Layer
The first layer of caulk establishes the basic composition.
Jay applies caulk directly from the caulk gun, working across the canvas in the order that makes sense for the composition — usually background elements first, foreground elements last. The caulk is applied in lines, shapes, and masses that correspond to the elements of the painting.
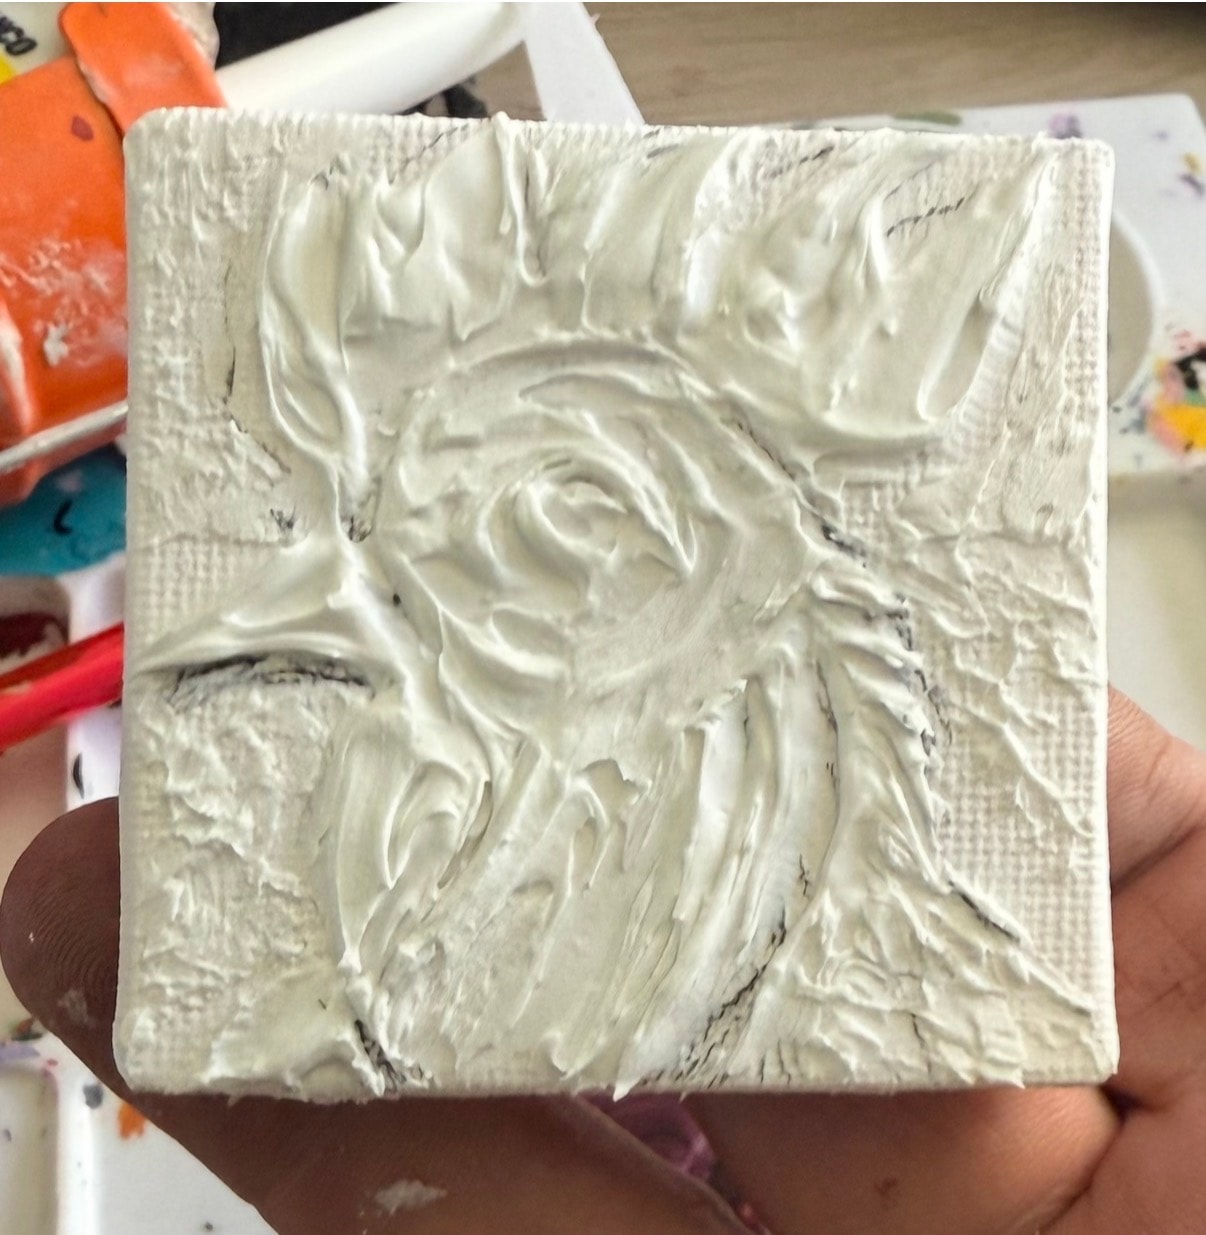
At this stage, the painting looks nothing like the finished work. It looks like white ridges and blobs on a flat surface. This is normal. The composition will become clearer as layers are added.
Key rule at this stage: Do not apply too much caulk at once. Thick applications take longer to cure and can sag or lose their shape. Thin, controlled applications are better.
Stage 3: Curing — The Most Important Step
Once the first layer is applied, Jay stops.
He lets the caulk cure completely. This can take anywhere from a few hours to overnight, depending on the thickness of the application and the humidity in the studio.
This is the step that most people skip, and it is the most important step.
Applying a second layer of caulk over uncured caulk creates instability. The layers can separate. The caulk can sag. The texture can lose its definition. The entire structure can become soft and unpredictable.
Fully cured caulk is firm, stable, and ready to accept another layer. You can press on it without it deforming. It has no give. When you reach that point, the next layer can be applied.
Stage 4: Building Up Layers
With the first layer cured, Jay applies the second layer — and this is where the painting starts to reveal itself.
The second layer adds height and definition to the forms established in the first layer. Tree trunks become more defined. Flower petals develop their curves. The composition starts to read clearly.
Additional layers follow the same pattern: apply, cure, apply, cure. Each layer adds more detail and more height. The number of layers depends on the painting — some areas need only two layers, others need four or five to achieve the height and detail Jay wants.
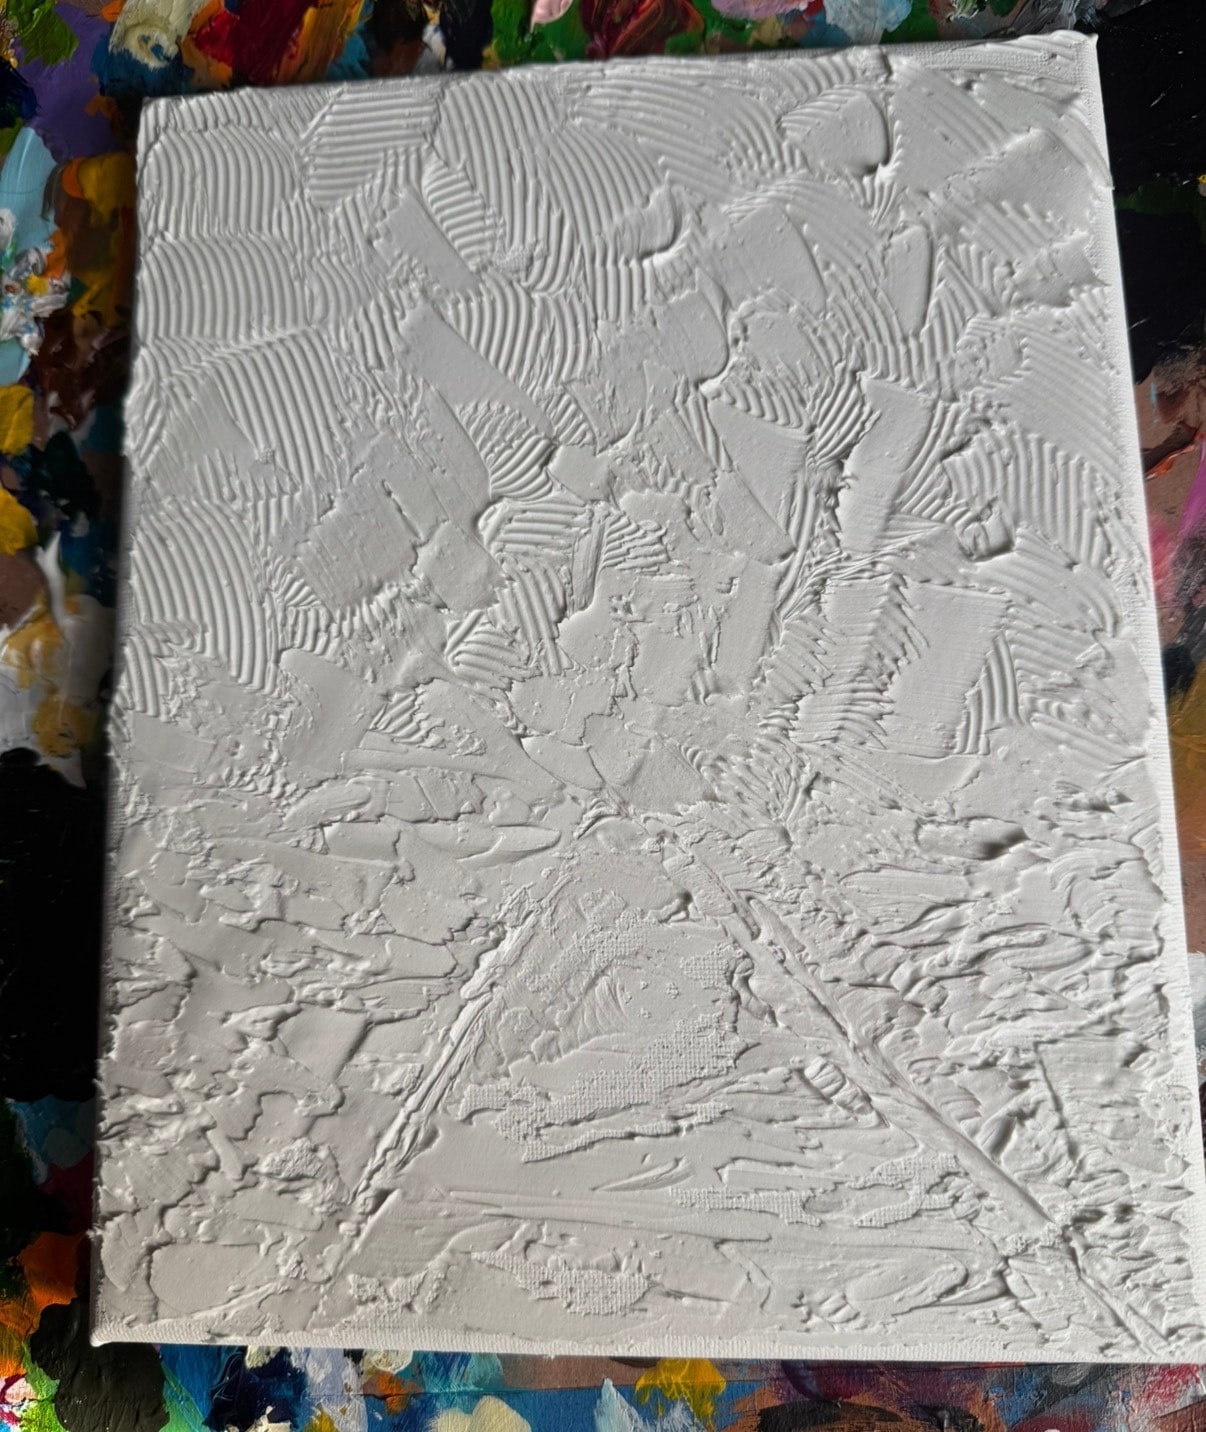
Stage 1: The first caulk layer establishes the basic composition. The forms are rough but intentional.
Stage 5: Shaping and Detailing
Between layers, and during the final caulk stage, Jay uses palette knives and brushes to shape the caulk into specific forms.
This is where the fine detail is added:
- Individual feathers on a rooster
- Wing veins on a butterfly
- Bark texture on a tree trunk
- Petal edges on a flower
The caulk can be shaped while it is still wet — within the first few minutes after application. Once it begins to skin over, it cannot be reworked without tearing the surface. Jay works quickly and decisively in this window.
Stage 6: Final Curing
Once all caulk layers are applied and all detail work is complete, the entire surface must cure completely before painting begins.
Jay tests the surface by pressing firmly on the thickest areas. If there is any give — any softness or flexibility — the caulk is not fully cured. He waits.
Only when the entire surface is firm and stable throughout does he pick up a brush.
Stage 7: Painting
The painting stage is where the caulk sculpture becomes a painting.
Jay applies acrylic paint over the cured caulk surface. The paint is relatively thin — not impasto-thick, just regular paint applied with brushes. The texture you see in the finished painting is entirely the caulk. The paint is just color.
The key to painting over caulk texture is working with the forms, not against them:
- Darker tones in the recessed areas — the valleys between ridges naturally fall into shadow, and darker paint in these areas reinforces that effect
- Lighter tones on the raised surfaces — the peaks of the caulk catch the most light, and lighter paint on these surfaces reinforces the three-dimensional effect
- Color transitions that follow the texture — color changes that align with the caulk forms make the texture read more clearly
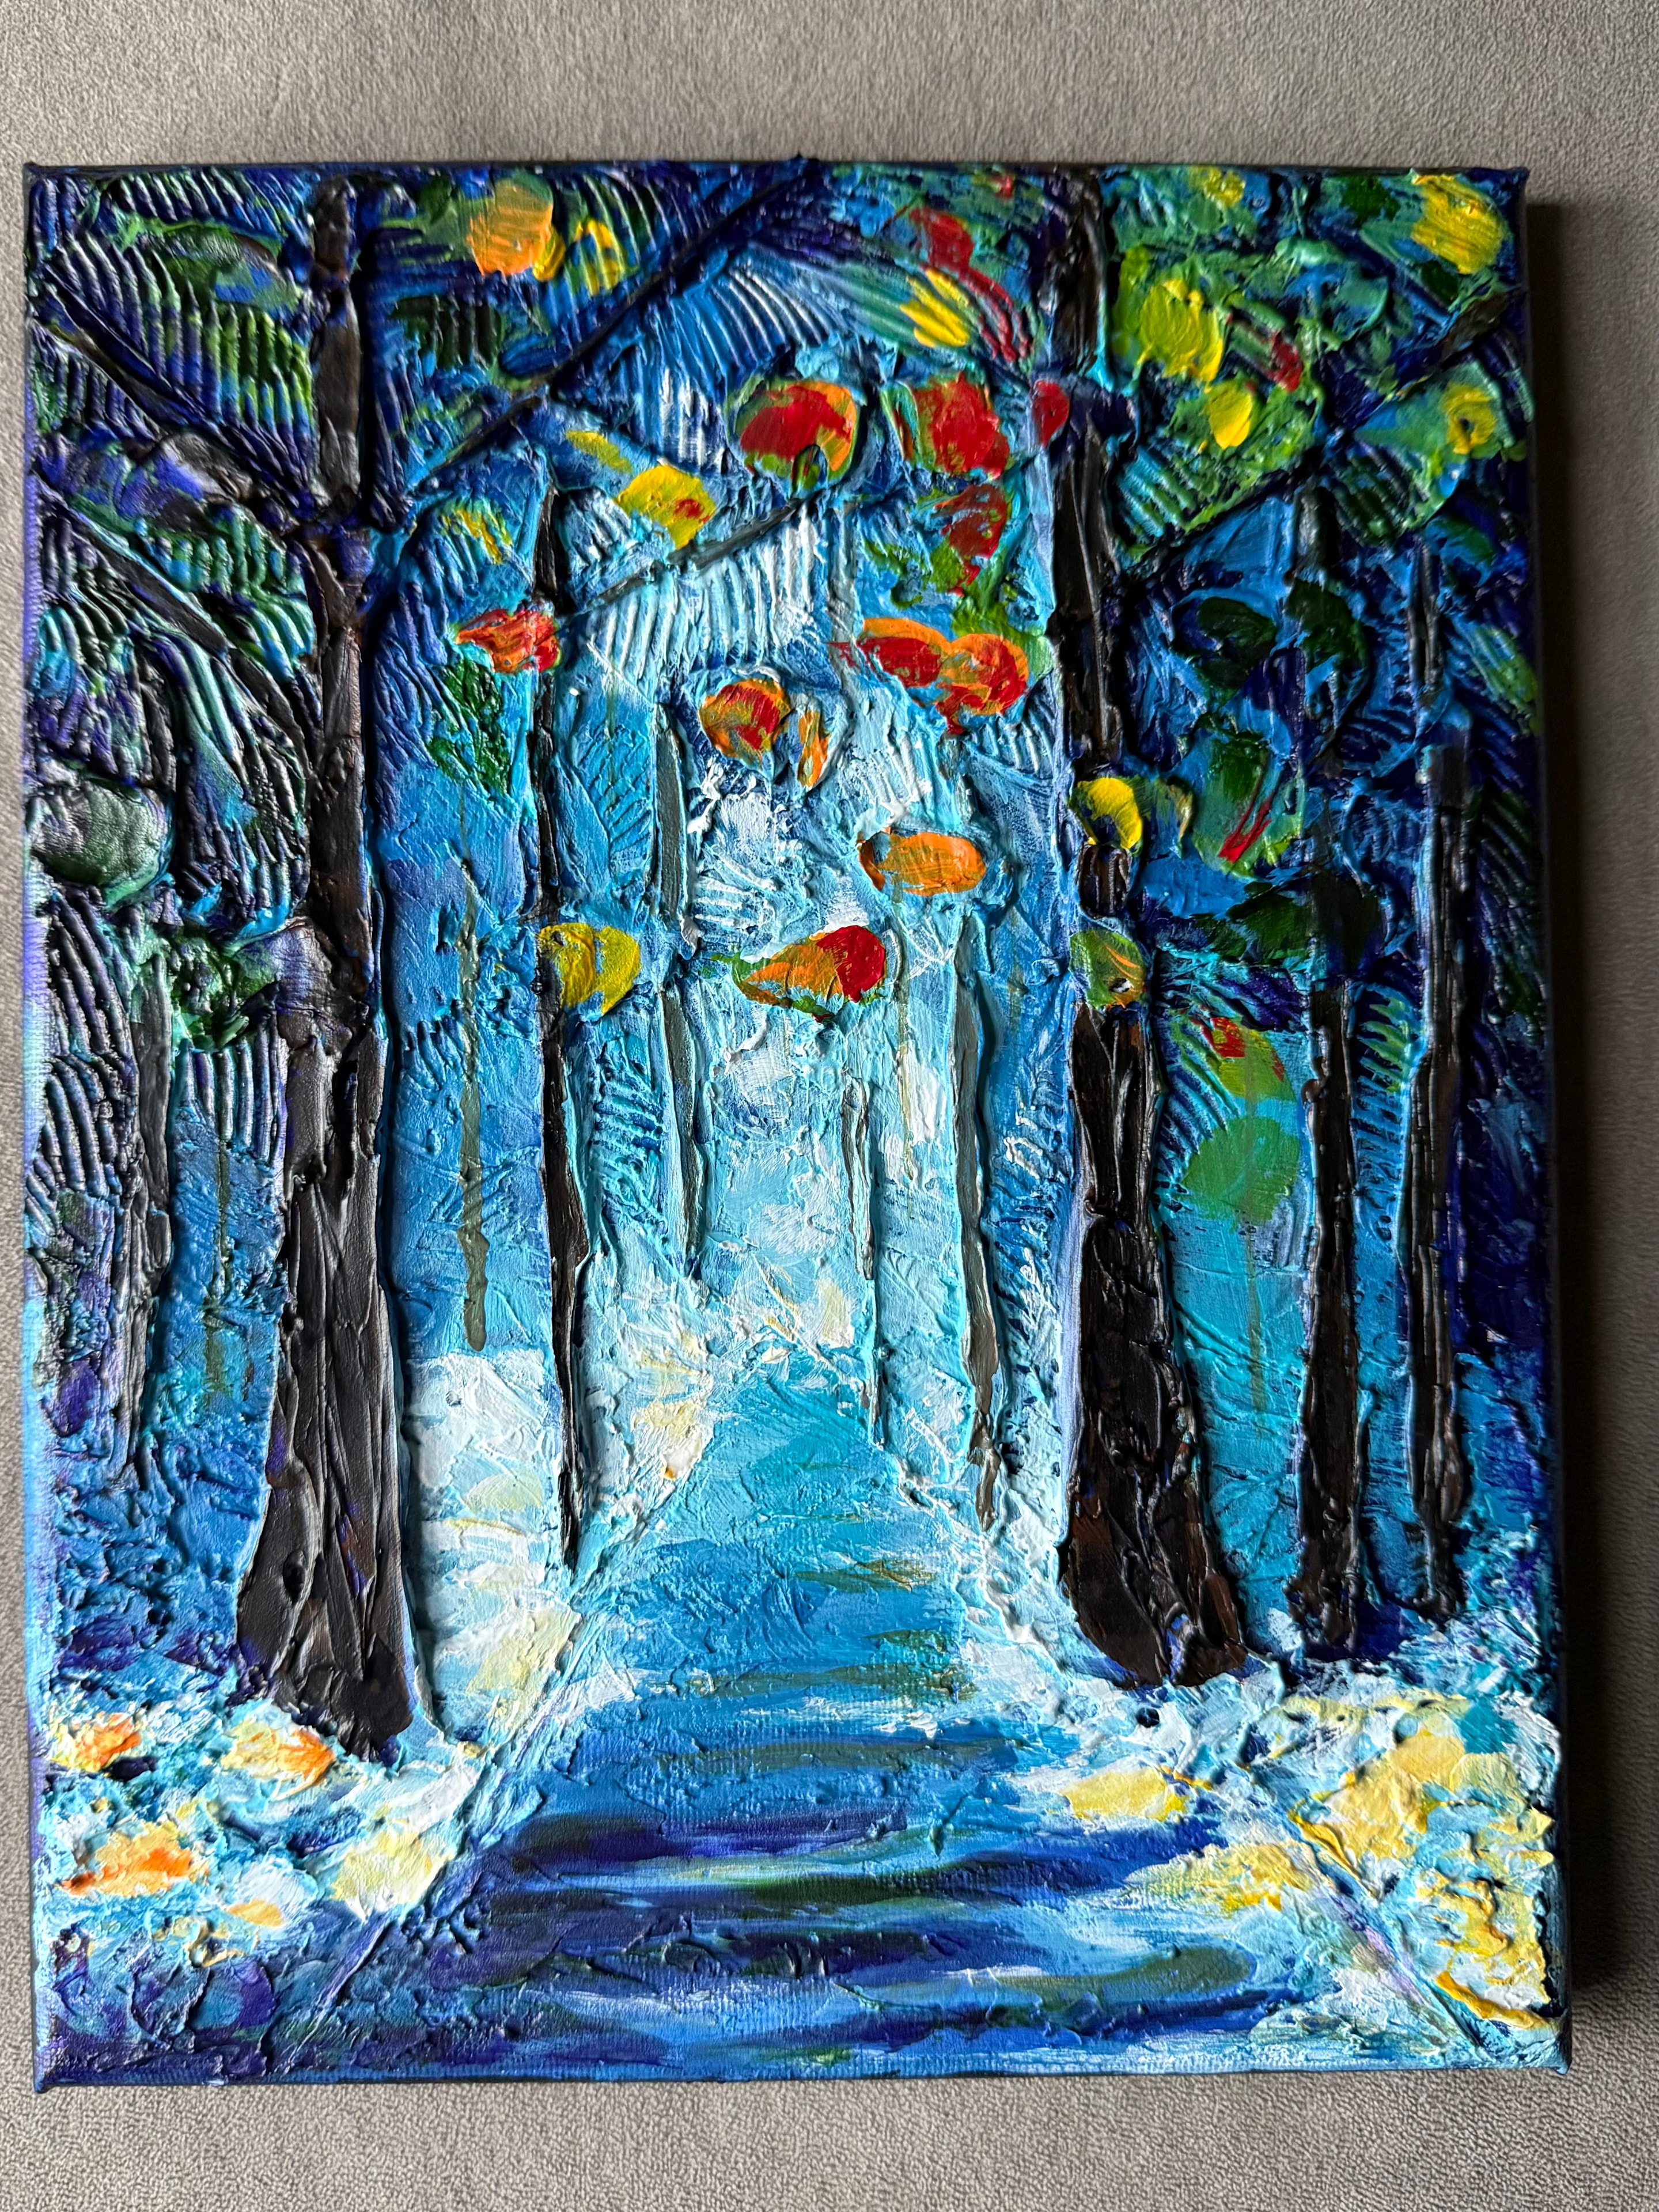
The finished Blue Forest Path. The caulk sculpture is now fully painted. The three-dimensional texture creates real depth and shadow.
The Result: A Painting That Cannot Be Replicated
Every caulk texture painting is unique. Because the texture is built by hand, no two paintings are ever identical — even if Jay painted the same subject twice, the caulk application would be different.
And because the texture is physical — not painted, not printed, not reproduced — it cannot be captured in a photograph or replicated in a print. The only way to own a caulk texture painting is to own the original.
See the Technique in Action
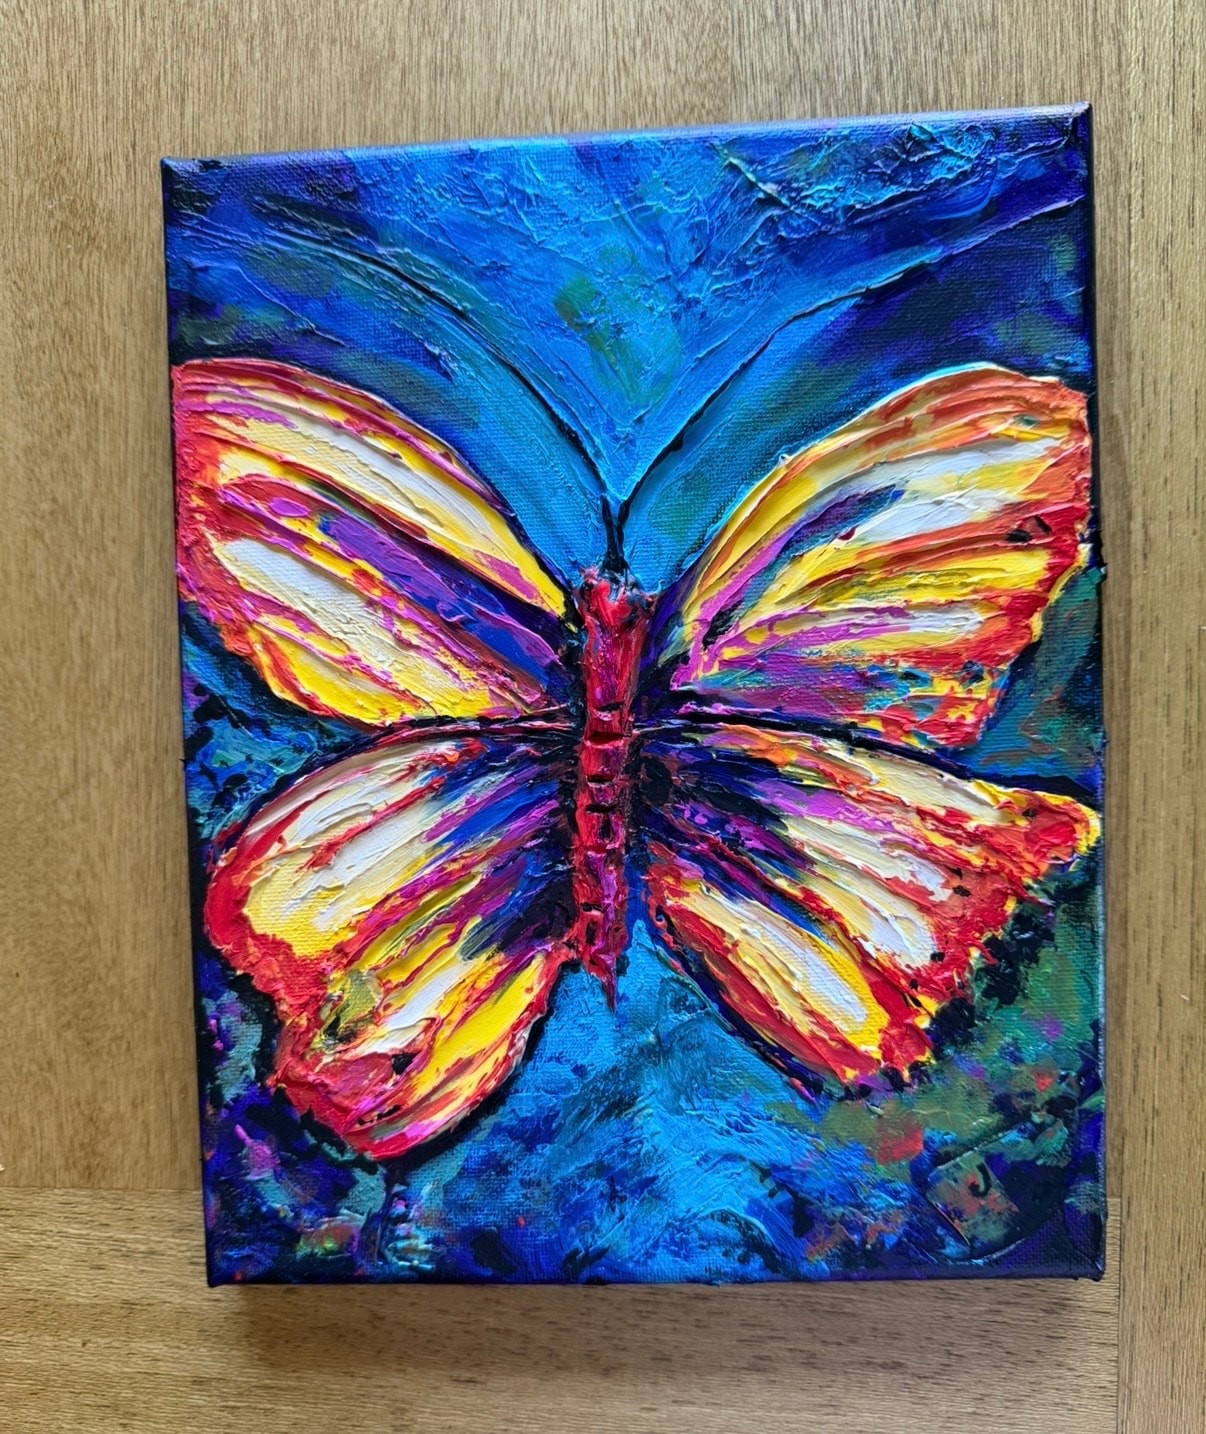
The best way to understand caulk texture painting is to see the before-and-after transformation:
Before and After: Butterfly Caulk Transformation →
How Jay Painted Blue Forest Path: Step by Step →
Or browse the full gallery to see every caulk texture painting available:
Text Jay at 330-285-3136 to ask about any painting or commission a custom original. He ships nationwide from Akron, Ohio.
Go deeper: The complete caulk art authority guide → | What is caulk art? → | Caulk Art 101 →