How to Create Texture Artwork with Caulk
Want to know how to create texture artwork that actually has physical depth? Jay the Painter breaks down the caulk technique step by step — from blank canvas to finished painting.
People ask me all the time: how do you create texture artwork like that? How do you get the paintings to look three-dimensional? What is the secret?
The answer is caulk. Specifically, silicone caulk from a hardware store, applied to canvas with a caulk gun before any paint touches the surface.
It sounds simple. In some ways it is. But there is a lot of nuance in how you apply it, how you build the composition, and how you paint over it once it dries. This post walks through the entire process — from blank canvas to finished painting — so you can understand exactly how to create texture artwork the way I do it.
Why Caulk Instead of Paint?
Before we get into the how, it is worth understanding the why.
Most texture artists who want physical depth in their work use thick paint — impasto technique, palette knife application, heavy body acrylics. These methods work. They create real texture. But they have limits.
Thick paint can only get so thick before it starts to crack as it dries. It is also expensive — heavy body paint costs significantly more than standard acrylics. And the texture you can achieve with paint alone is limited by the viscosity of the medium.
Caulk has none of these limitations. It dries hard and permanent. It does not crack. It is cheap. And it can be applied in any thickness, any shape, any form — from thin lines to thick ridges to fully three-dimensional sculptural elements.
When I figured out that caulk could be used as a structural medium for painting, it changed everything about how I approach texture artwork.
What You Need to Create Texture Artwork with Caulk
The supply list is shorter than you might expect:
- Canvas — stretched canvas or canvas board, any size
- Silicone caulk — standard paintable silicone caulk from any hardware store
- Caulk gun — a basic caulk gun, nothing fancy
- Palette knife or sculpting tools — for shaping the caulk after application
- Acrylic paint — any brand, any colors
- Brushes — a variety of sizes for painting over the dried caulk
- Varnish or sealant — to protect the finished painting
That is it. The most expensive item on the list is the canvas. The caulk itself costs a few dollars a tube.
Step 1: Plan Your Composition
Before you pick up the caulk gun, know what you are going to build.
This is the most important step in learning how to create texture artwork with caulk, and it is the one most beginners skip. Because caulk dries hard and permanent, you cannot easily undo it. You need to know where every major element of your composition is going before you start applying.
I sketch lightly on the canvas with pencil first — just the major shapes and outlines. Nothing detailed. Just enough to know where the focal point is, where the horizon line falls, where the main forms are going to live.
For a floral painting, that means knowing where the flower center is, roughly how large the petals will be, and where the stem and leaves will go. For a landscape, it means knowing where the horizon is, where the main tree trunks or mountain forms will be, and what the foreground will look like.
Take your time here. Five minutes of planning saves an hour of frustration later.
Step 2: Apply the Caulk Structure
This is where the painting actually begins.
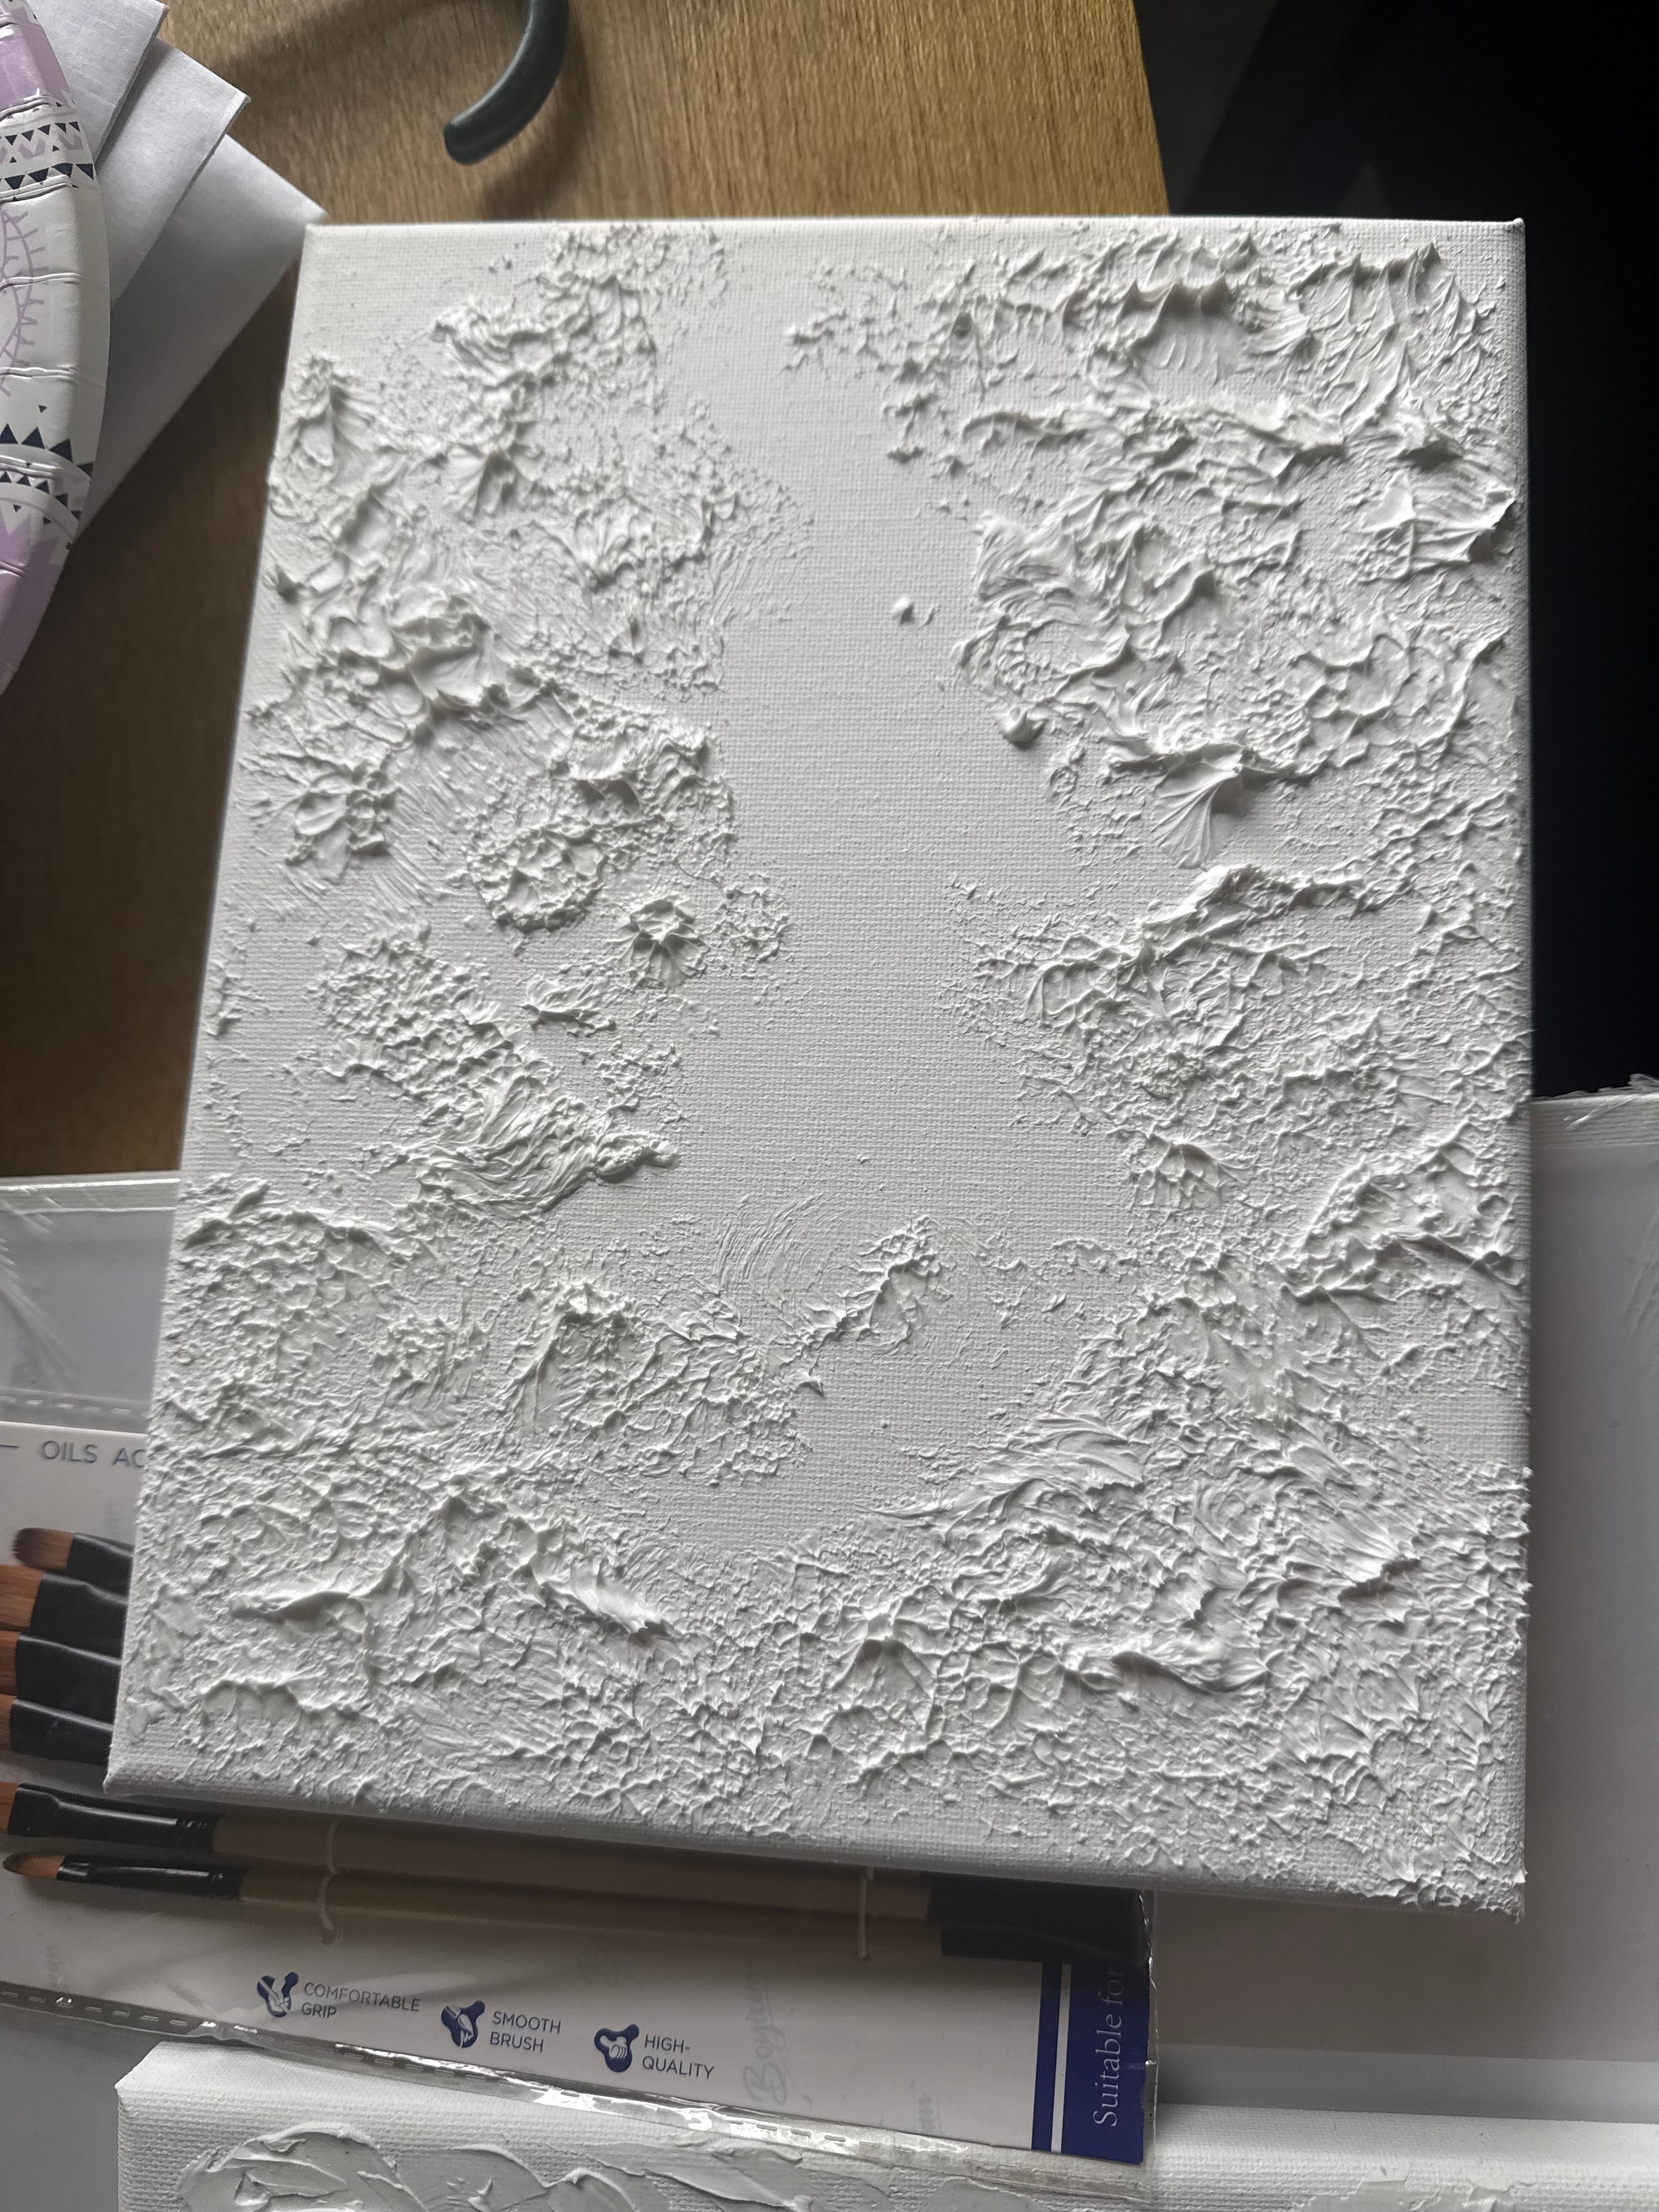
Load your caulk gun and start building the composition. The key principle is this: apply caulk where you want physical depth and texture. Flat areas of the painting — backgrounds, skies, negative space — get little or no caulk. The focal elements — flowers, trees, faces, abstract forms — get built up in thick, sculptural caulk.
For a floral painting, I build each petal as a separate raised form. I squeeze a bead of caulk along the petal outline, then use a palette knife to shape it — pulling the caulk outward from the center, creating the natural curve and taper of a real petal. Each petal gets its own caulk structure, its own shape, its own thickness.
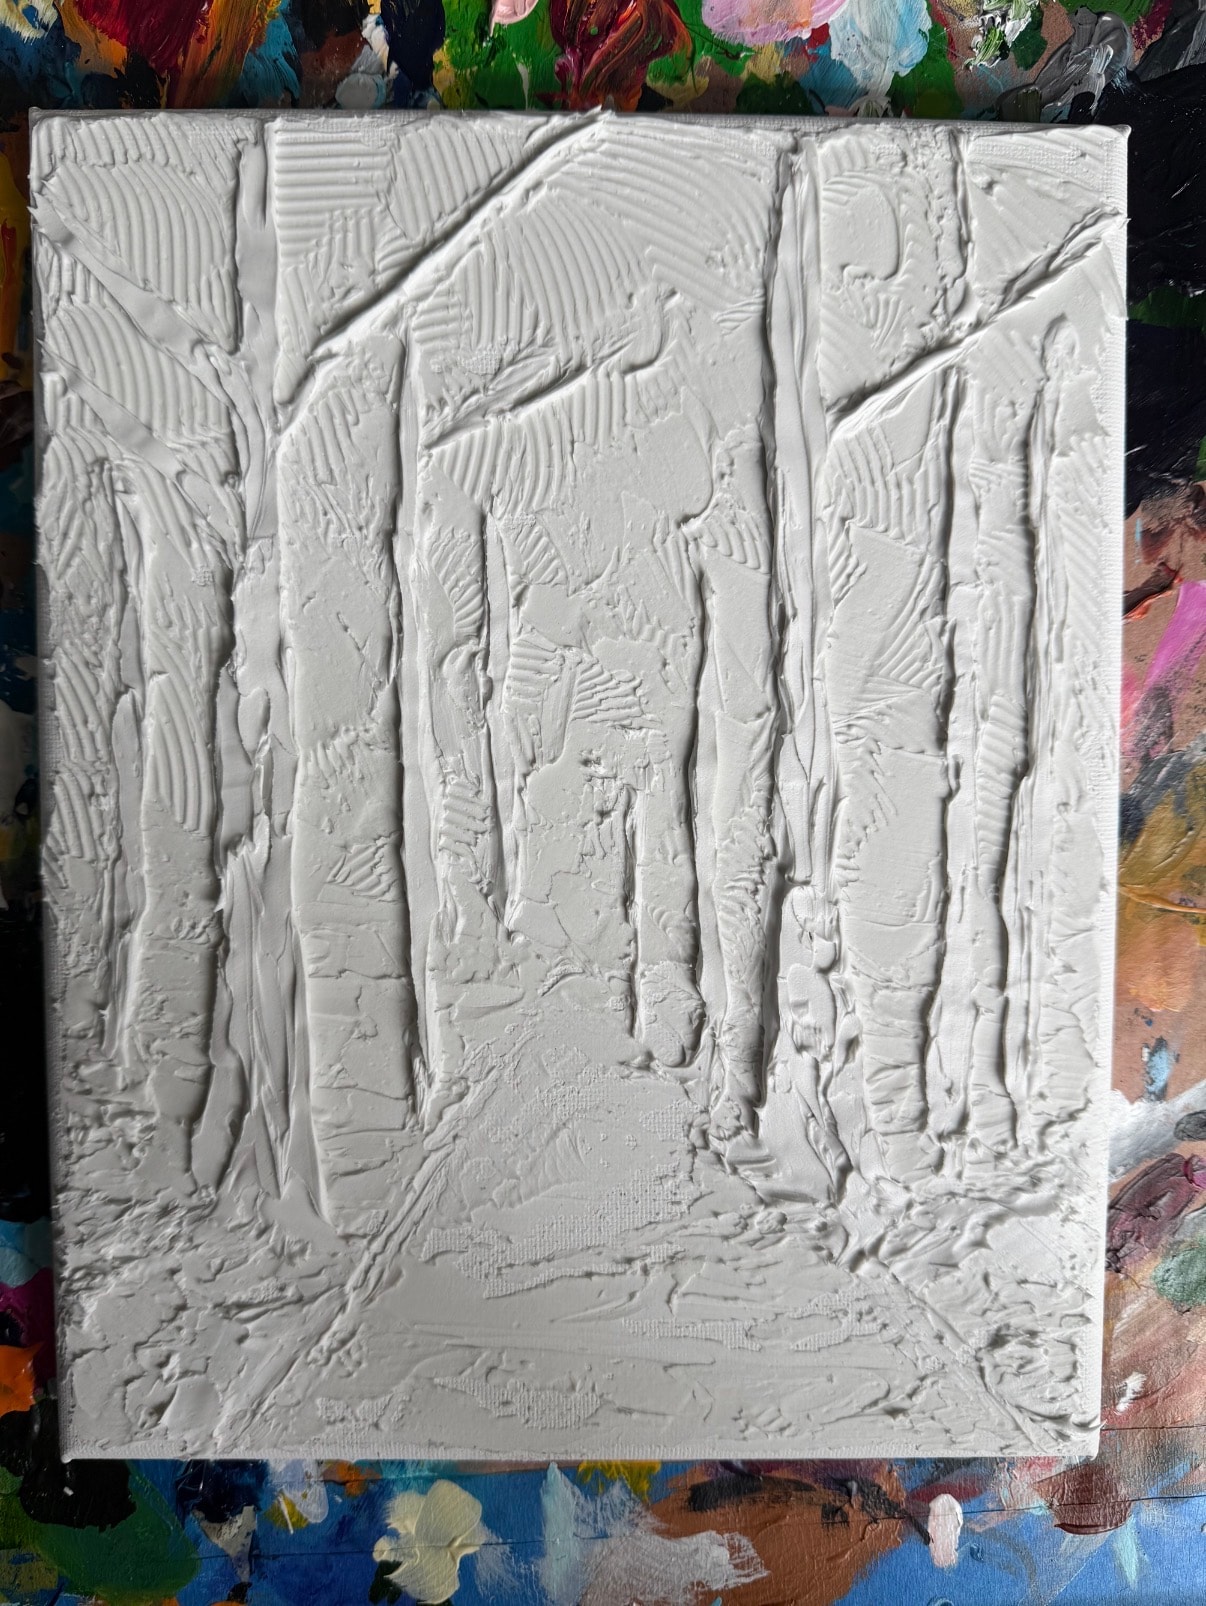
Here is what the process looks like in the early stages — this is the Ohio Autumn painting before any paint was applied:
Stage 1: The caulk structure is applied to the canvas. All the major forms — tree trunks, leaf clusters, sky areas — are built in white caulk before any paint is applied.
For a landscape, I build the tree trunks as thick ridges of caulk, the leaf canopy as clusters of smaller caulk forms, and the foreground as a textured surface that catches light differently than the background.
The caulk does not need to be perfectly smooth. In fact, rough, irregular caulk application often produces better texture than perfectly smooth application. The irregularities catch light in interesting ways and give the finished painting a more organic, natural quality.
Step 3: Let It Dry Completely
This step requires patience, and it is non-negotiable.
Silicone caulk needs to dry completely before you paint over it. Depending on the thickness of your application and the humidity in your workspace, this can take anywhere from 24 to 48 hours. Thick applications — really built-up sculptural forms — may need 72 hours.
Do not rush this. Painting over wet or partially-dried caulk will cause the paint to slide, the caulk to deform, and the whole composition to lose its structure. Wait until the caulk is completely hard and firm to the touch before picking up a brush.
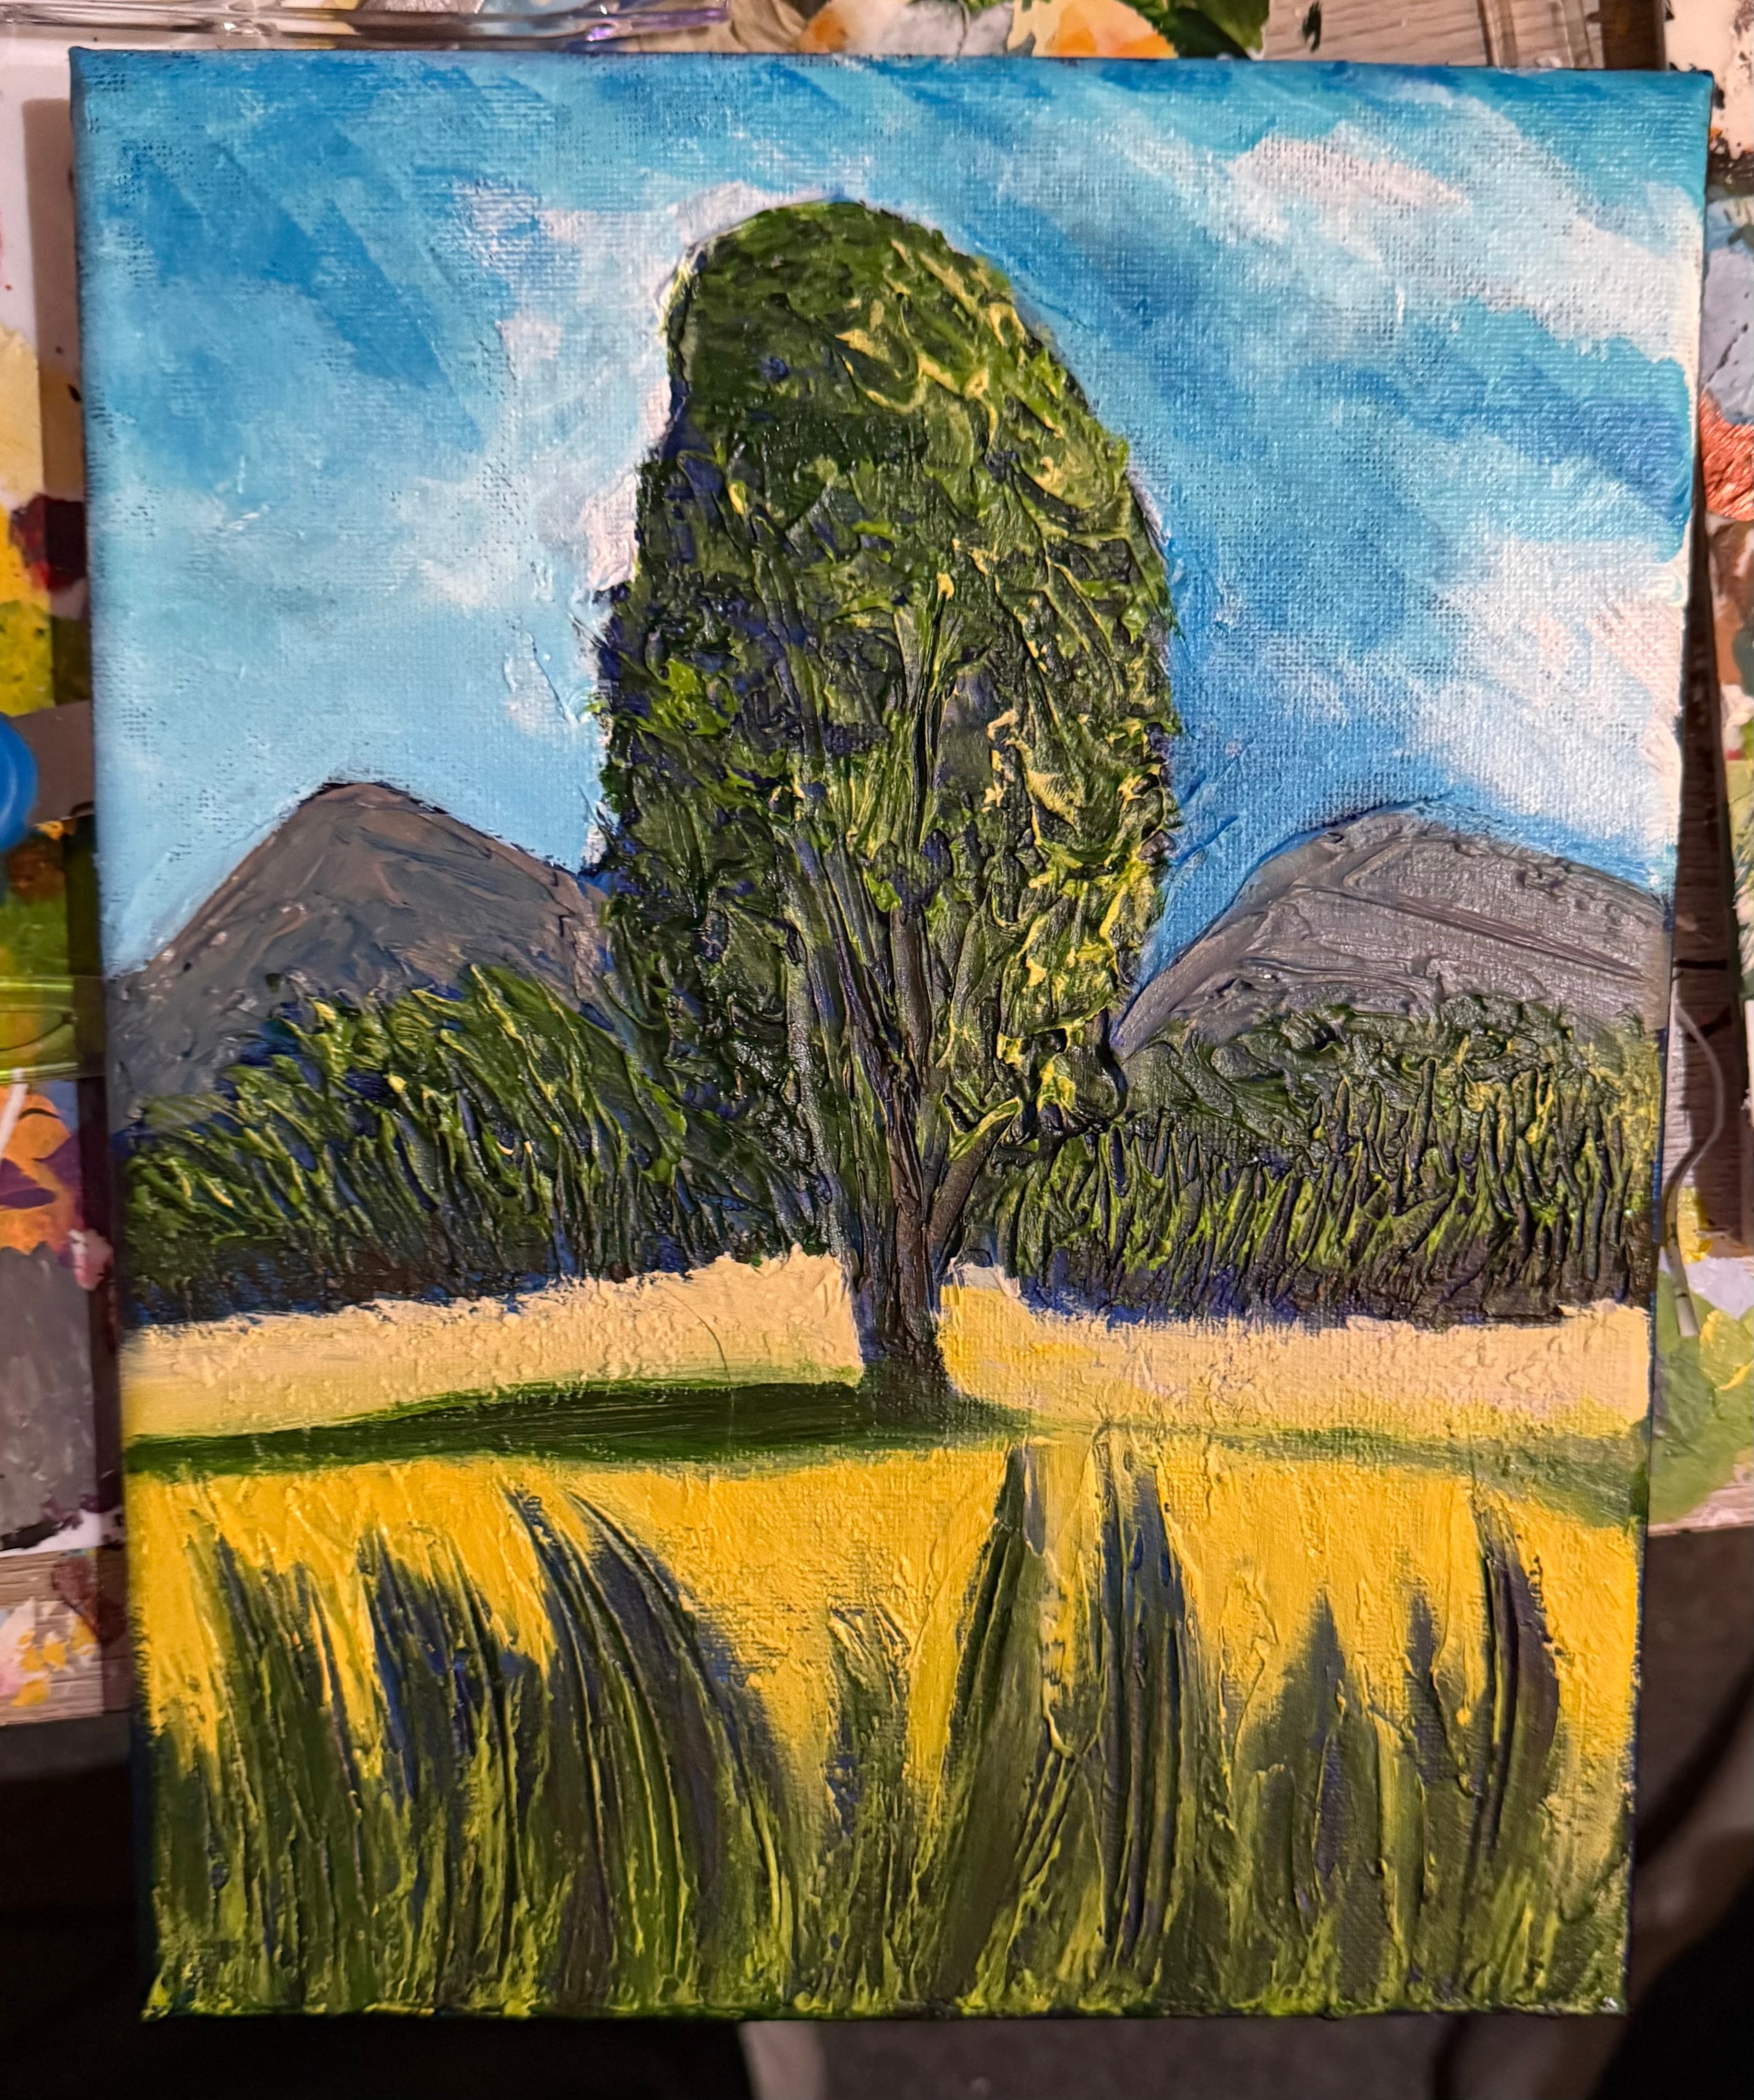
Here is what the Ohio Autumn painting looked like partway through the drying and early painting process:
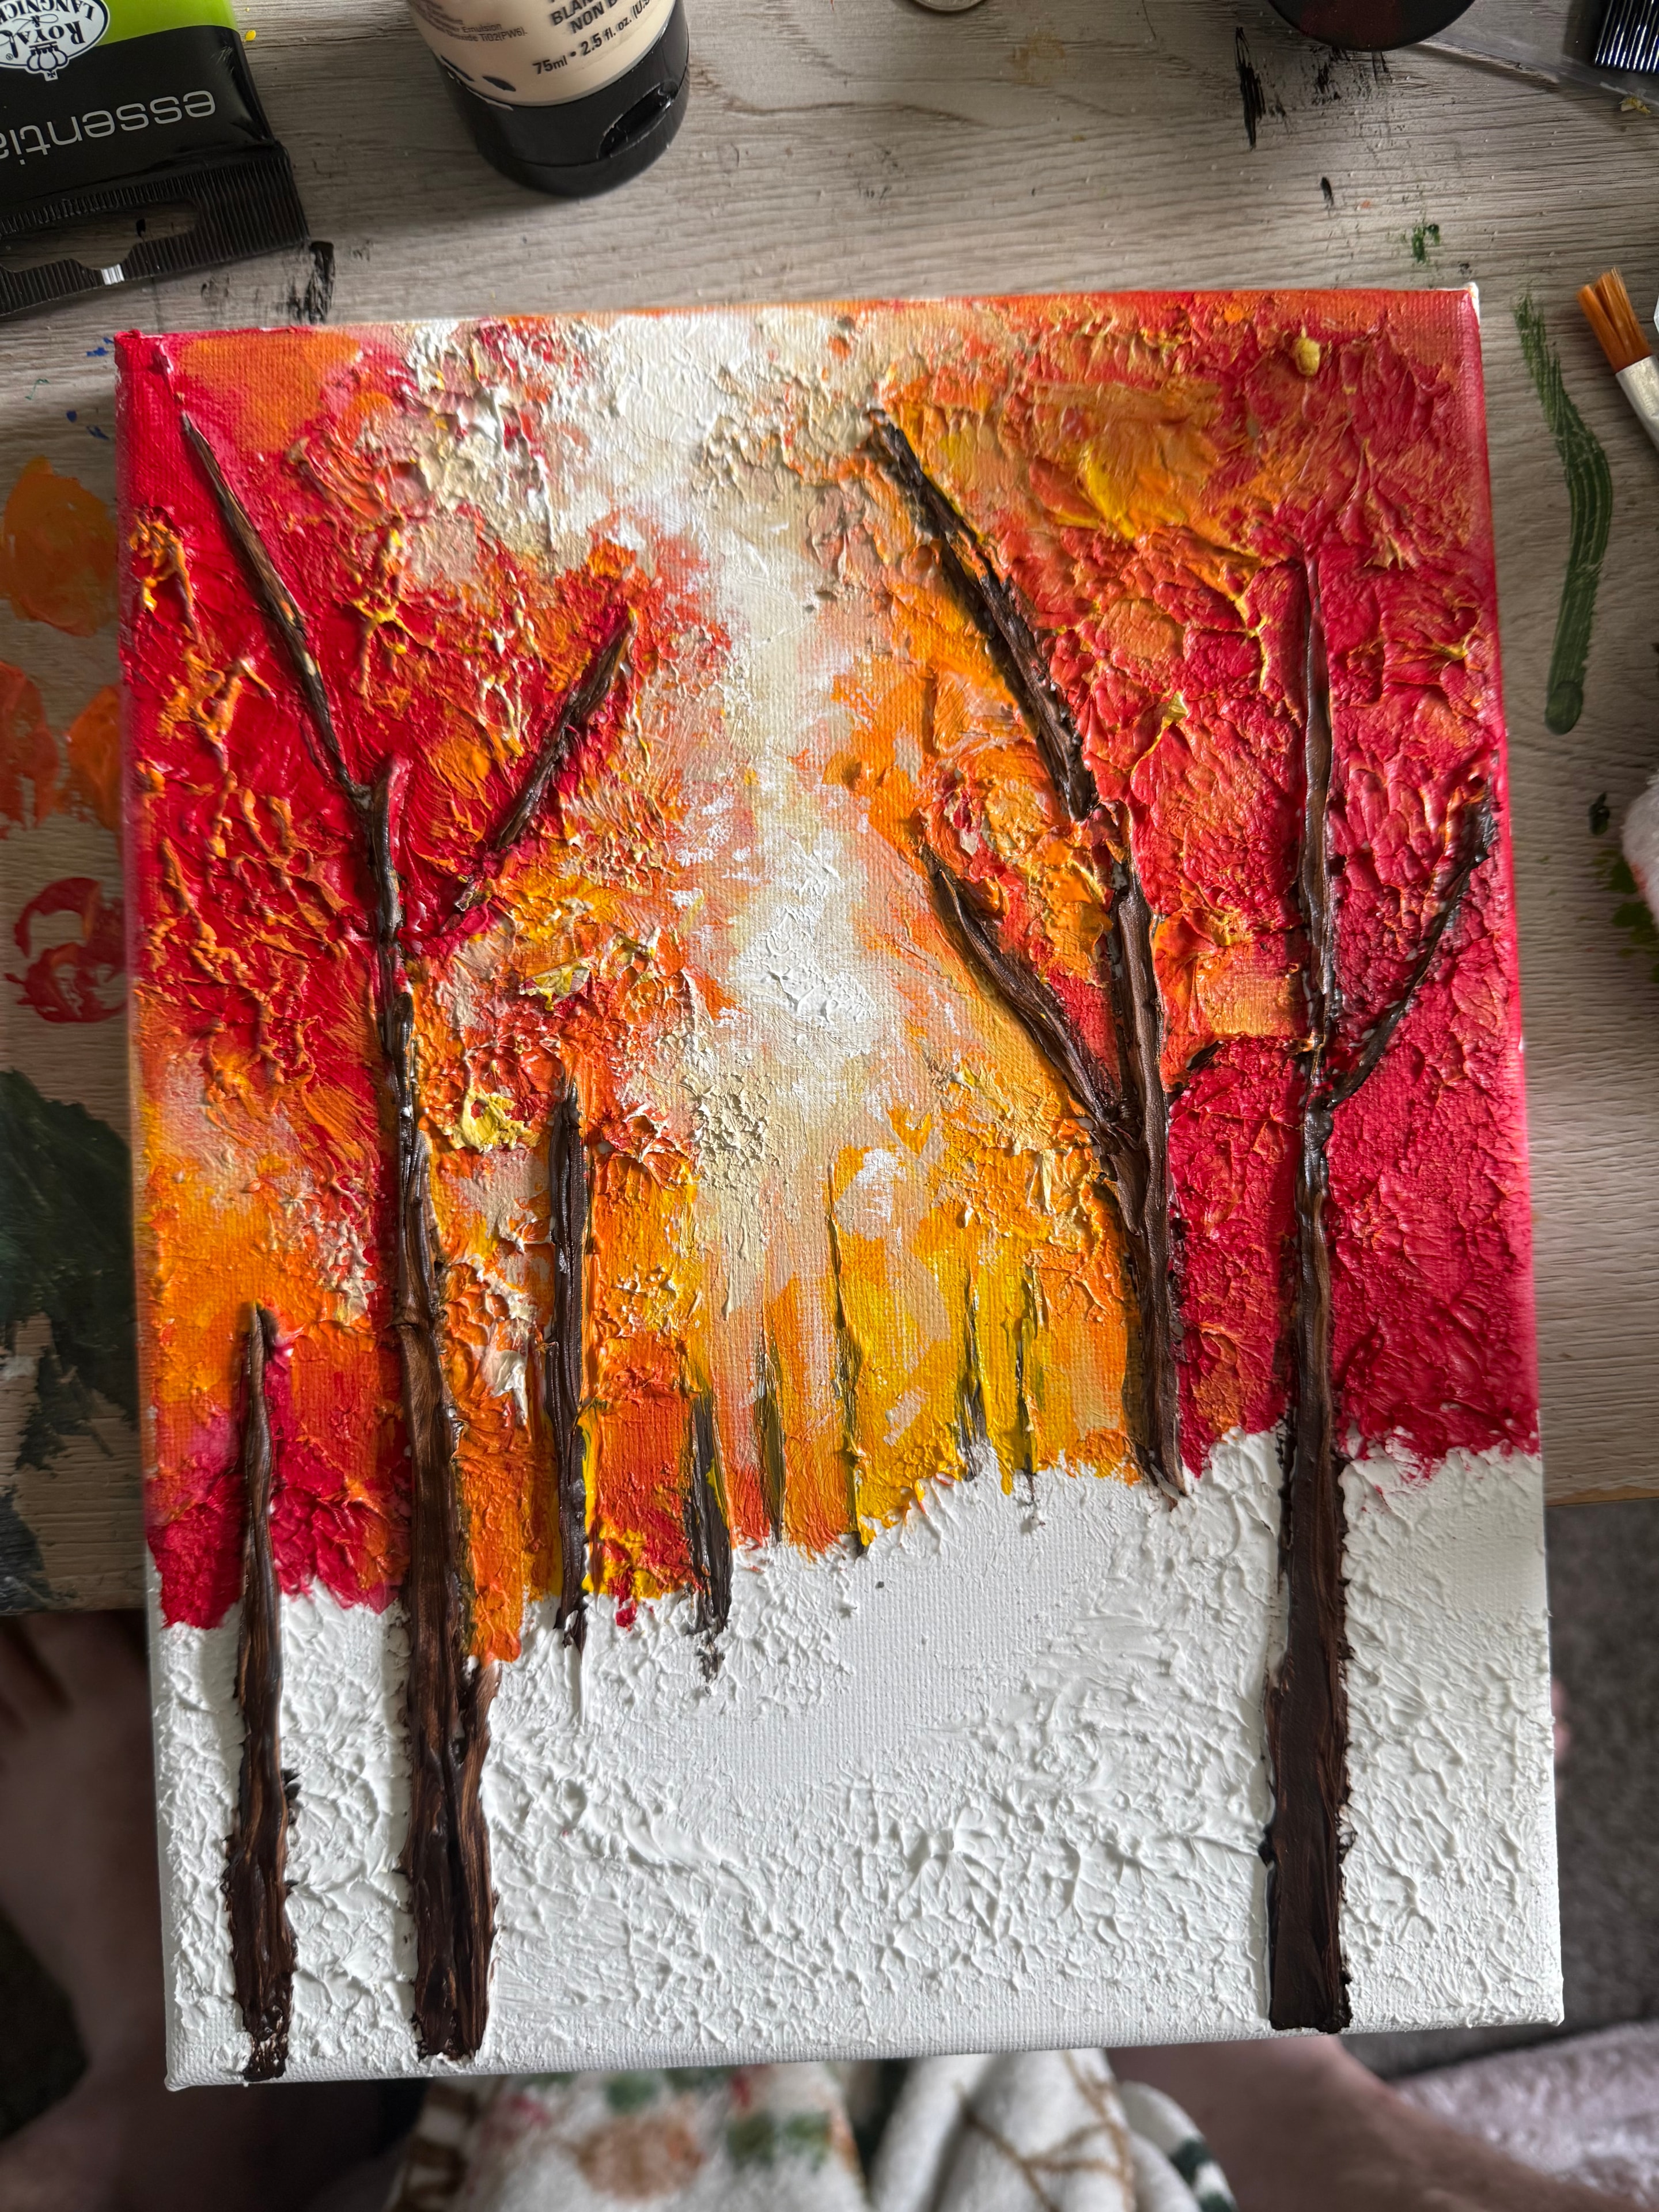
Stage 2: Early paint layers going on over the dried caulk structure. The texture is already visible.
Step 4: Apply the Base Paint Layers
Once the caulk is fully dry, you can start painting.
The first paint layers are about establishing the overall color palette and filling in the major areas of the composition. I work from background to foreground — sky first, then distant elements, then midground, then foreground and focal elements.
For the background areas — sky, distant landscape, negative space — I use relatively thin paint applied with a brush. These areas do not have much caulk texture, so the paint goes on smoothly and evenly.
For the textured areas — the caulk forms — I use slightly thicker paint and work it into the crevices and ridges of the caulk structure. The goal at this stage is not to achieve the final color but to establish the underlying tone that will show through in the final layers.
Step 5: Build the Color and Detail
This is where the painting comes alive.
Working over the dried caulk structure, I build up color in layers — adding depth, variation, and detail with each pass. The caulk ridges catch the paint differently than the flat areas, creating natural variation in tone and value that would be impossible to achieve with brushwork alone.
For floral paintings, I paint each petal individually — working from the base color outward, adding highlights on the raised ridges and shadows in the valleys. The three-dimensional caulk structure does most of the work. The paint just needs to follow the form.
For landscapes, I build the color from back to front — establishing the sky and distant elements first, then working forward through the midground and into the foreground. The caulk texture in the foreground catches the most paint and creates the most visual interest.
Here is the Ohio Autumn painting in its final stage:
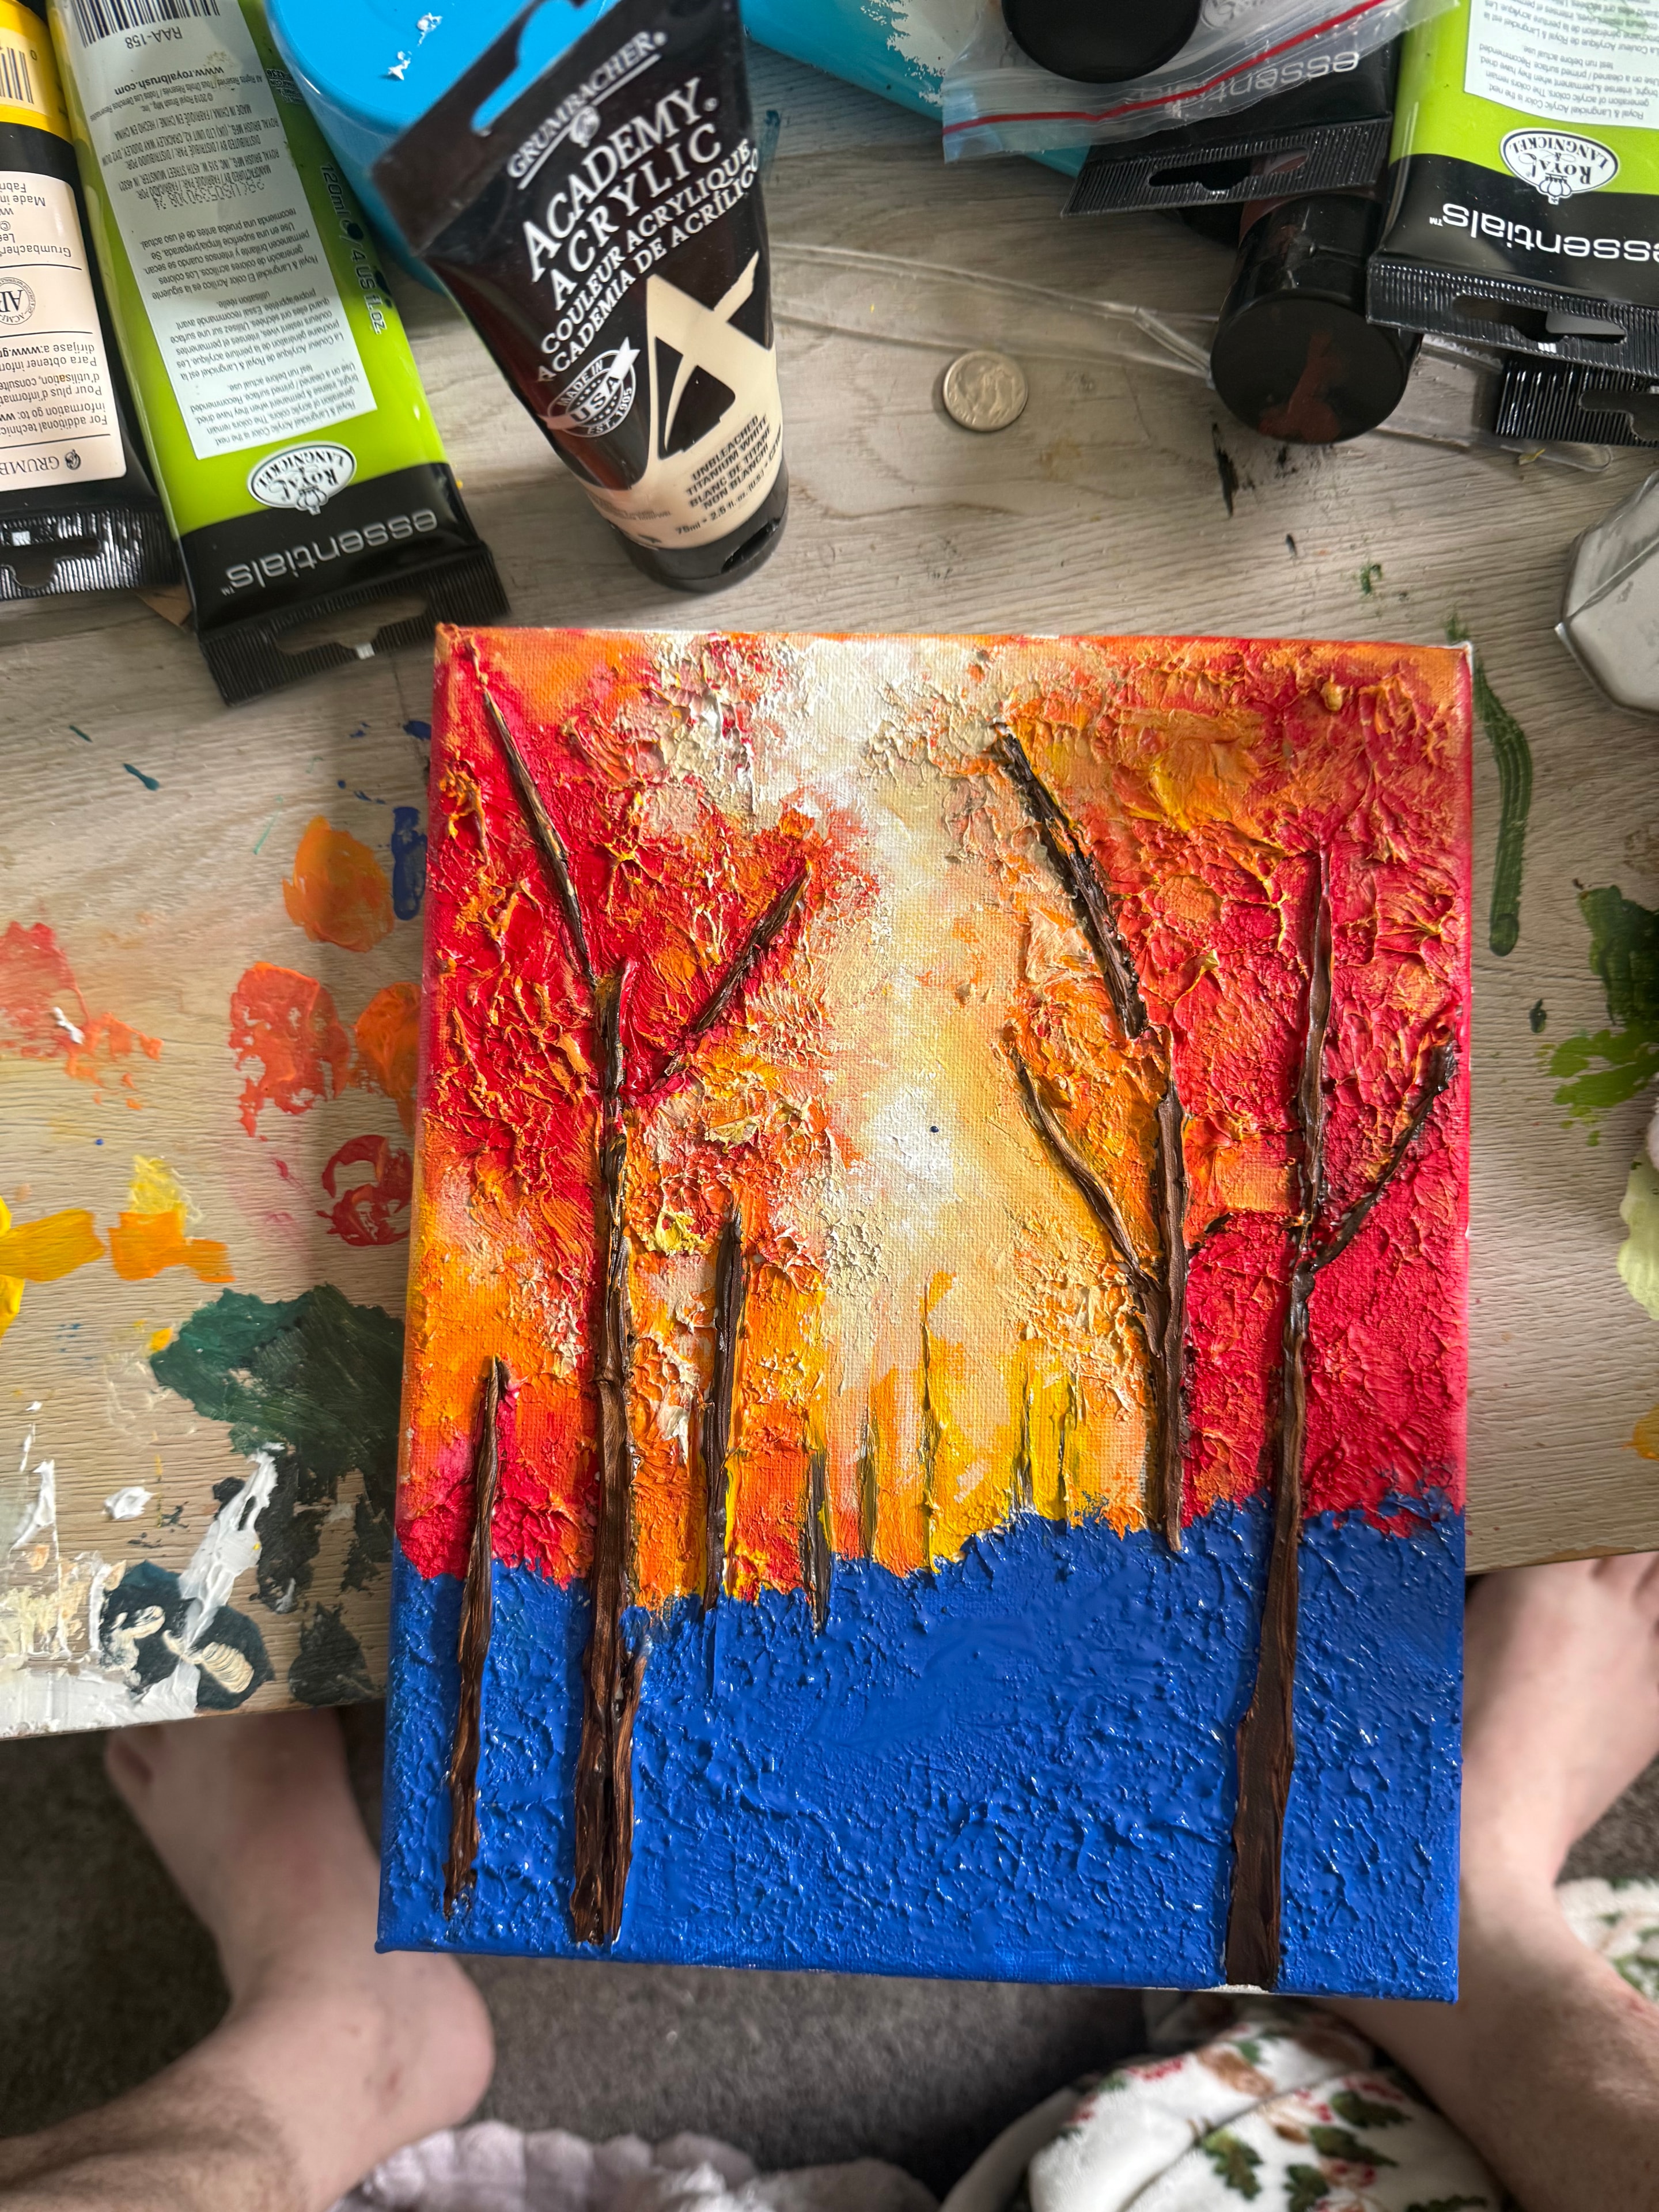
Stage 3: The finished painting. The caulk structure underneath gives the autumn foliage genuine three-dimensional depth.
And here is the completed Ohio Autumn Fire and Blue Sky painting:
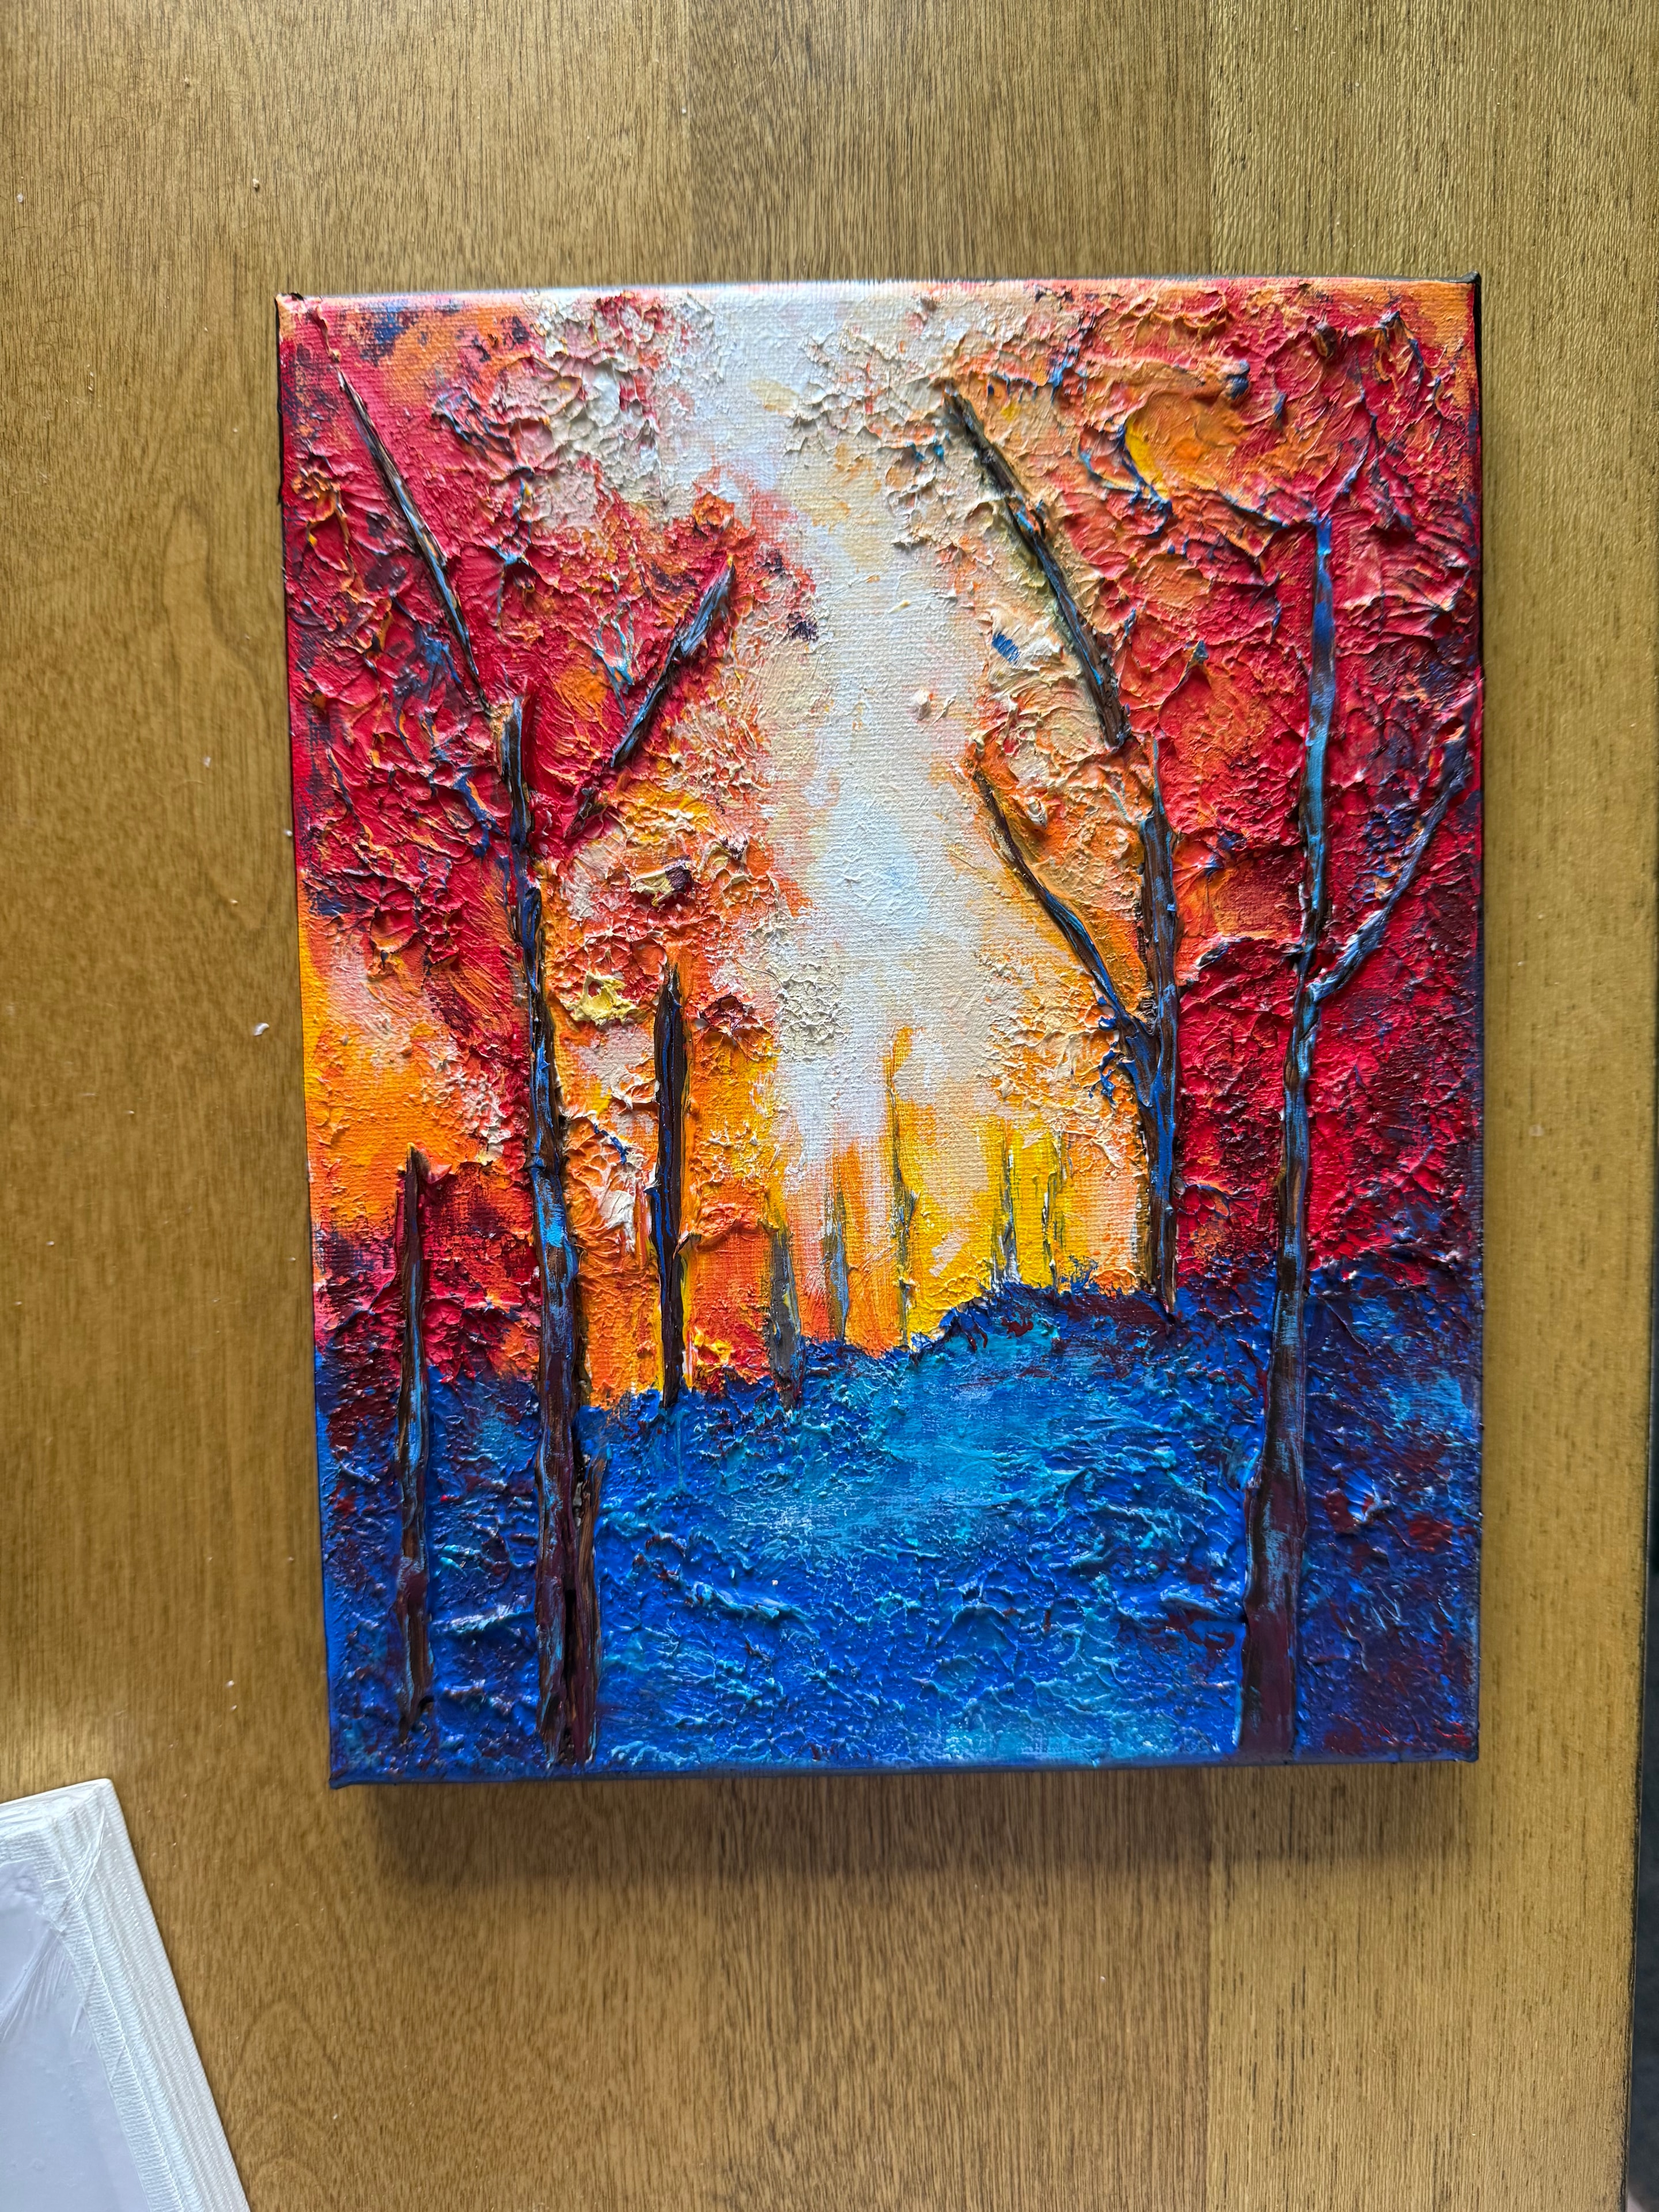
Ohio Autumn Fire and Blue Sky — the finished painting. 8"×10", $150. This is what the caulk texture process produces.
Step 6: Seal and Protect
Once the painting is complete and fully dry, I apply a varnish or sealant to protect the surface.
For caulk texture paintings, I use a brush-on varnish rather than a spray — the three-dimensional surface makes spray application uneven. I apply the varnish in thin layers, working it into the crevices of the caulk structure to ensure complete coverage.
The varnish protects the paint from UV damage, dust, and moisture. It also gives the finished painting a consistent sheen — either matte, satin, or gloss, depending on the look you want.
The Rooster: Another Process Example
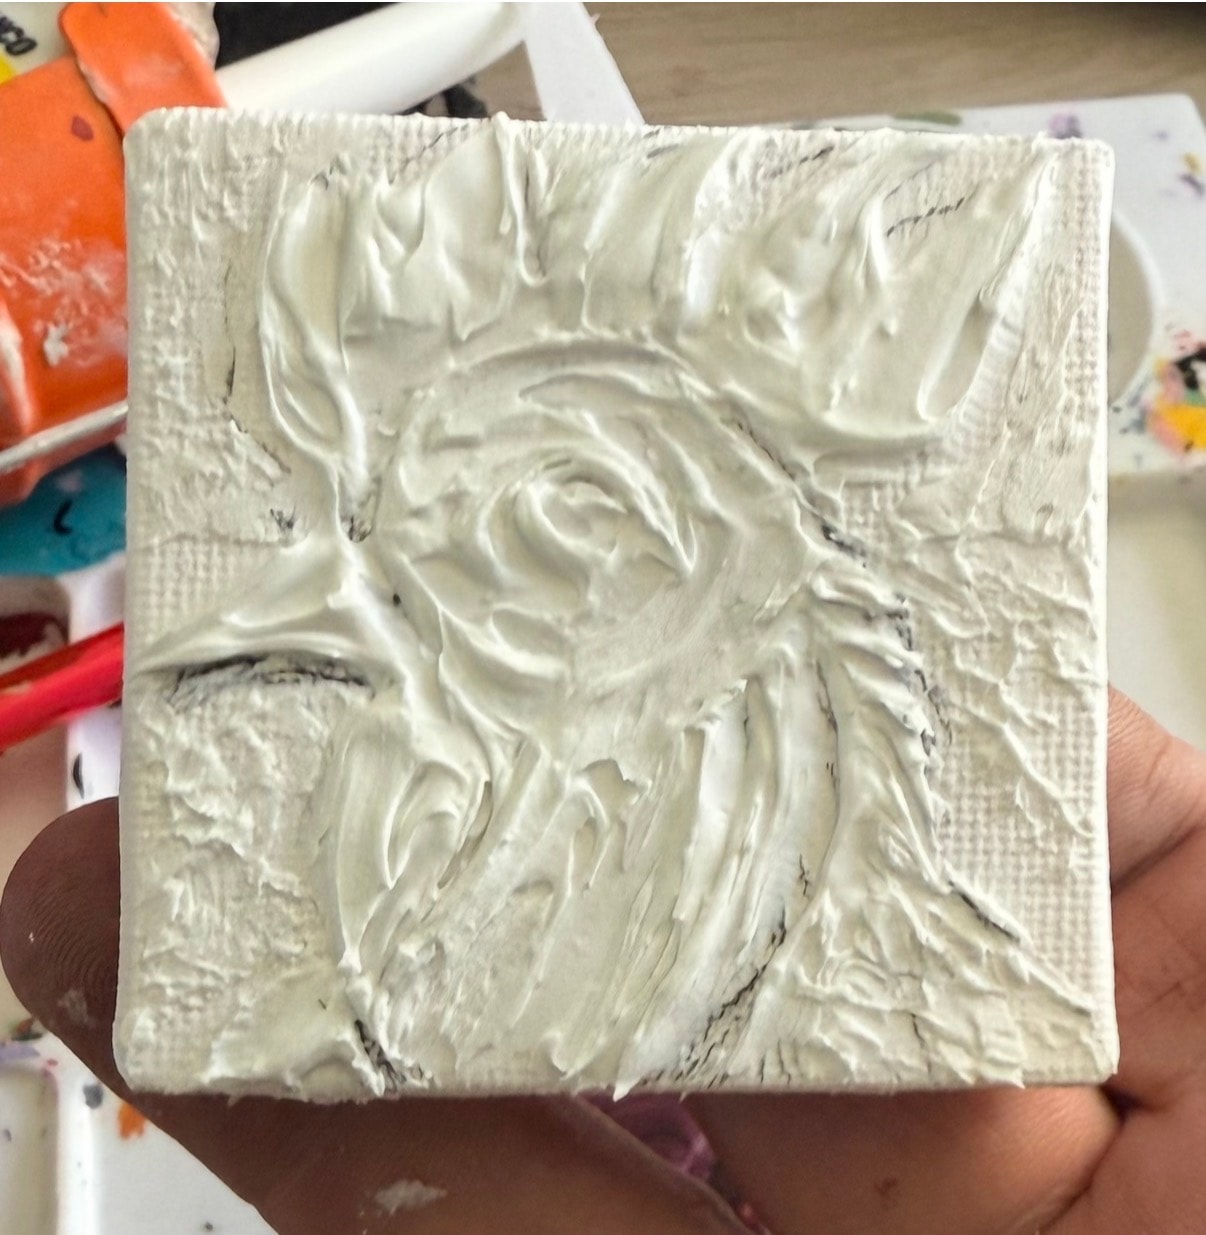
The caulk technique works across subjects. Here is another example — the rooster painting — showing the before and after:
The rooster painting before paint — the caulk structure defines every feather and form.
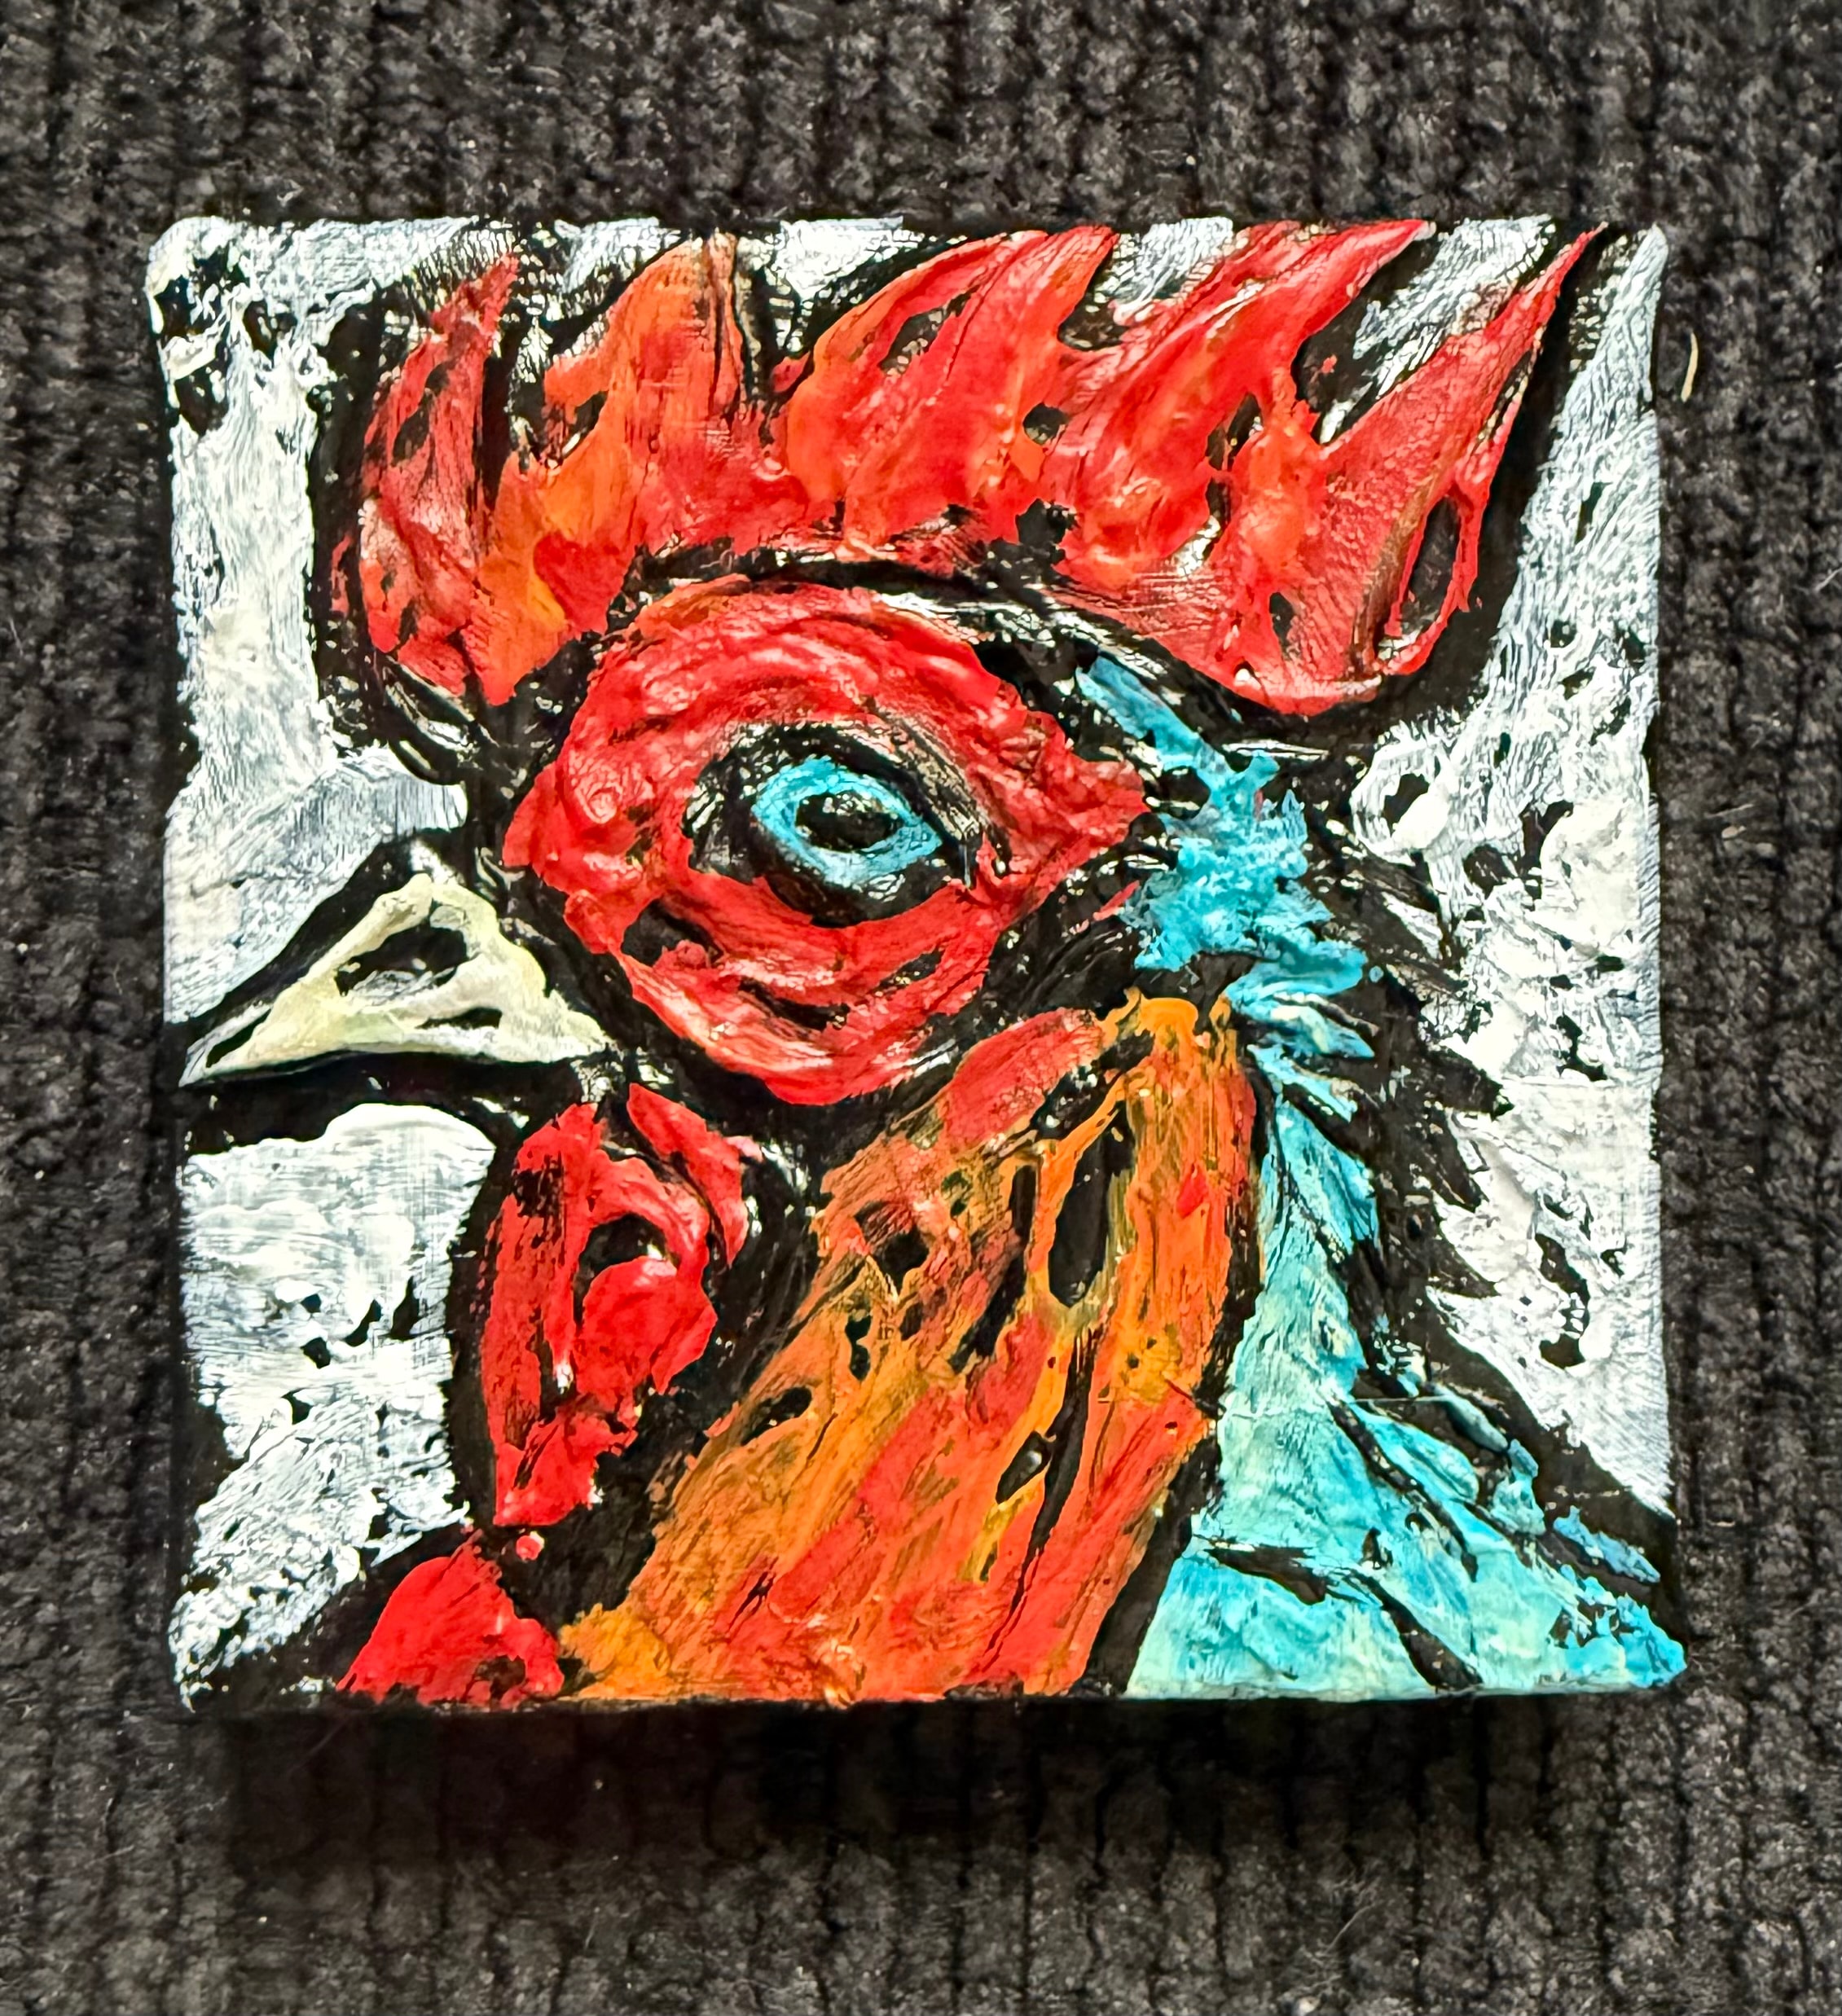
The finished rooster painting. The caulk structure under the paint gives every feather genuine physical depth.
Common Mistakes When Learning How to Create Texture Artwork
Applying caulk too thin. The whole point of caulk texture art is physical depth. If you apply the caulk in thin, flat layers, you lose the three-dimensional quality that makes the technique special. Build up the focal elements generously.
Not letting the caulk dry completely. This is the most common mistake. Painting over wet caulk ruins the structure. Wait the full 24–48 hours.
Using too many colors in the base layers. Keep the early paint layers simple. Establish the major color areas first, then build detail and variation in subsequent layers.
Ignoring the background. The background areas of a caulk texture painting are just as important as the textured focal elements. A well-painted background makes the textured elements pop. A sloppy background undermines the whole composition.
Rushing the finish. The final paint layers and the varnish application both require patience. Take your time. The painting has already done most of the work — the caulk structure is there. The final layers just need to bring it to life.
See the Technique in Action
The best way to understand how to create texture artwork with caulk is to see the finished results. Browse the full collection at jaythepainter.com/artwork — every painting there was made using this exact process.
If you have questions about the technique, reach out through the contact page. I am always happy to talk about the process with people who are genuinely curious about how it works.
Explore Topics
Written by
Jay the Painter
Content creator and writer sharing insights and stories.